Fly Fishing Traditions


Fly Fishing Traditions Blog and Website
"It's about Life & Fly Fishing"

Wednesday, April 30, 2014

Fly Tying - Shop Vac, CHC Caddis, Iris Caddis, Antron Caddis Pupa

I was playing around yesterday and downloaded some patterns from Blue Ribbon Flies and tied some up. Here's some background on the patterns, photos, and recipes.

The "Shop Vac"

The "Shop Vac" was originated in Montana and earned it's name for "vacuuming" out the holes and runs of some the major western rivers. Its an all purpose nymph in the style of a pheasant tail and serendipity nymphs. It is reported to be a favorite as a dropper off a hopper.

An alternate tie is to add peacock herl behind the bead instead of the black thread.


Hook #14-18 Dairiki 135
Bead - Gold Bead
Thread - 8/0 Black
Rib - Small Copper wire
Wing - White Zelon

Alternate Tie: Peacock herl behind the bead

Iris Caddis

The "Iris Caddis" is the perfect pattern to use when trout are taking emergent pupa in the film or subsurface. You can use it for all caddis by matching color and size.


Hook - Tiemco 102Y
Thread - 8/0
Shuck Gold Amber Crinkled Zelon
Body - Antron Blend (Applied using a dubbing loop) Dubbed with guard hairs left long
Legs - Partridge
Head - Antron Blend

CHC Caddis - Caribou Hair Caddis

The CHC Caddis (Caribou Hair Caddis) works well for selective trout in low light conditions in the evenings. By integrating the caribou hair it makes the fly float well. This fly can be a little hard to see when fishing in low light conditions, but worth trying. It is tied on a curved hook.


Hook - 15-19 Tiemco 102Y
Thread - 8/0
Shuck - Zelon
Body - Anton Blend (applied using a dubbing loop)
Wing - Caribou Hair

Antron Caddis Pupa

This fly was developed for fishing in the film when caddis are hatching. It does not have a wing so it is harder to see. It is tied in a very buggy style using a dubbing loop, with antron fibers. It has a short zelon tail or shuck, buggy antron body, partridge out riggers for legs and a darker dubbed head.

Hook - 14-20 Tiemco 100
Thread - 8/0
Shuck- Gold/Amber crinkled Zelon
Body - Antron fibers ( buggy with a dubbing loop)
Legs - Partridge
Head - Antron Blend


Tuesday, April 29, 2014

Thingamastone & Thingamahopper

I was checking out Blue Ribbon Flies looking for a recipe for the "Shop Vac" when I came upon the latest strike indicator sensation.

Introducing the "Thingamahopper"


And we're not done yet!


Also introducing the "Thingamstone"

I betcha that these won't sink! What will they come up with next.

Clay

Monday, April 28, 2014

The Gidget


I've heard the fly "Gidget" mentioned many times by Keith Kaneko on his blog and alawys wondered, "What the heck is a Gidget"


For those aging baby boomers out there... From the popular sitcom "Gidget"

"...Wait'll you see my Gidget. You'll want her for your Valentine. You're gonna say she's all you adore..."

Well, it went something like that. This particular pattern is named appropriately, not to mention being about as cute and petite as Sally Field was in 1965/1966, This is one of Mike Mercer's tying creations.

What's A "Gidget?"

The television program Gidget was titled based on the primary character's nickname; a conjoined version of the words "girl" and "midget." Mike Mercer's "Gidget" may not be exclusively feminine, but it is on the small side. In fact, Mercer himself has said:

"The Mercer Midgeling, with its transparent glass bead head was such a success, I wanted to go down pretty much the same road - incorporate the best "triggers" of the Midgeling, but with a brass bead head that would sink the fly much more quickly."

On that basis, Mercer's Gidget can be used to imitate a midge (particularly a chironomid) or even a small mayfly; although Mercer also has another, similar pattern called the Micro Mayfly for that specific hatch. (You can read about the Micro Mayfly in Mercer's book Creative Fly Tying) With the copper/brass bead, it will sink faster than his Midgeling, making it more useful in "faster" currents and/or deeper waters. But, given the size, it's not going to sink "like a rock" by itself in faster/deeper water. Think split shot or as a dropper behind a heavier nymph in all but the most benign flows.
The Gidget can be used even in the largest rivers. As Mercer noted:

"Interestingly, the Gidget has become a more popular pattern, due no doubt to the metal bead, which made it an instant 'fan' favorite. Guides across the West have also warmed to it, which is most gratifying to me."

Some might be a fan of the 1959, Sandra Dee interpretation while others cite the 1965/1966 Sally Field portrayal of Gidget. The same holds true for Mike Mercer's Gidget Nymph. Some like the olive while others prefer the brown. Either way, you might give this pattern a try the next time you're looking for a small trailer fly or need a relatively quick sinking, albeit, "petite" midge pattern. Though your reasons may differ from Mercer's, you too just might find the Gidget most gratifying.


The Recipe

The Gidget differs in a couple of significant ways from the Mercer Midgeling. The Midgeling is tied on a TMC 2487, a curved shank hook, where the Gidget is tied on a straight shank TMC 3769. The Gidget incorporates a partridge fiber tail and "legs." Finally, as already noted, the Midgeling utilizes a glass bead and the Gidget has a brass bead. Thus, the recipe for the Gidget is as follows:

Hook: TMC 3769, sizes 16 - 20
Thread: UNI 8/0, brown or olive (I tend to use Gudebrod 10/0 for size 20's. It's no where near as strong as the UNI, but seems to lay flatter and, for me, slides "under" the bead a little better to help "hide" the head.)
Bead: Copper, to match hook size (Again, note that the Umpqua catalog listed it as being "gold." The copper version is what Mercer has specifically cited.)
Tail: brown, speckled Hungarian Partridge (I make the length about half the hook shank.)
Underbody: Pearl Krystal Flash
Overbody: Micro or Midge Tubing (The "official" recipe calls for olive or brown, but I've found that chartreuse and blood red also work; particularly when midge fishing.)
Legs: Same as tail
Wing Case: Loop of Pearl Krystal Flash, 3 - 5 strands (I have found, once again, for me that Pearl Midge Flash [a smaller diameter/length version of Krystal Flash] is much easier to work with; particularly on the 20's. However, you must make sure that the amount used is sufficient to create the "trigger" effect of the design. You know, trigger a strike...)
Head: Superfine dubbing, olive or brown (I tend to use olive with my chartreuse version and black or dark brown with the blood red variation.)

Sunday, April 27, 2014

Spring Time on the Yuba


Another pretty big storm is heading our way this week. I've been tied up with work for the last month. It seems like I haven't been fishing since December although that's not the case. It's a good day to go fishin'. The suns out, its warm and the river beckons. The Lower Yuba River is up with releases for irrigation in the valley. I believe that it's running over 22oo cfs. That's not great, but I really don't care, I just want to get out and get behind the oars with friends and enjoy the day.

Blake Larsen is coming along. As you may recall, Blake is the Project Manager for my construction business and we've both been burning the candle. We're both ready to get out and have a day on the river.

After setting up our shuttle we hit the river. It was definitely big, with a color that I would describe as bluish green, more blue than green with a visibility of 3 to 4 feet. Really perfect for stealth and still enough for the fish to see our bugs. The volume is the only thing that concerned me. The fishing can turn off and the fish sometimes get tight mouthed when there is a flow regime change. Blake rigged up his switch rod with shot and indicator, and we gave it a go. We first fished a big eddy pool and had a few downs, but no hookups. The takes were quick and we're thinking they may have been small smolts nipping at the bugs.

We decided we had spent enough time in the eddy hole so we started side drifting our indicators and nymphs as we traveled down stream. We ran into Dennis Carlson and his frequent fishing partner, Barbara, a little ways downstream. They had hooked a couple of nice fish in a deep pool, off a rock ledge, but the fish got the best of them and they weren't able to get them to hand. We wished them the best of luck. We passed them and Blake cast down and across, ahead of the boat towards the tailout. I no sooner mentioned to Blake that this portion of the tailout is where fish were holding earlier in the fall, when sure enough Blake hooked up. We drifted down through the riffle below the tailout and I eddied out and we were able to land a nice 16" bow and better yet, got the "skunk" off the boat.

We headed on down stream and picked up a few more fish under indicator. We picked up fish on a number of flies while dead drifting. Rubber leg stone, San Juan Worm, Prince of Darkness, HBI, Yuba Pupa, Caddis nymphs. They all seemed to work, so I'm thinking the fish were really just being opportunistic. Just gobbling up whatever came in front of their noses. There really wasn't anything hatching. That was until about 2:00.


We parked at a nice riffle, drop-off area, at about 2:00 when we saw some caddis starting to come off. They were larger caddis, about a size 14. Frank Rinella had told us to keep a look-out for this hatch. Blake waded into position at the head of the riffle and kept fishing there under indicator. I headed downstream to where I spotted an area that sort of tails out mid stream and then has a nice drop off. I saw a few fish starting to rise sporadically.

I rigged up with a sort of wet-fly or soft hackle method that I've used off and on for years on the Lower Yuba River. It's a 3 fly rigg with a dry or emerger with 2 flies trailing off it. I had a Quigley's Cripple on top, only because its a fishy fly and floats well when hanging a couple of flies behind it. I attached a caddis emerger 18 inches behind the cripple and a beadhead caddis nymph 18 inches behind it. This proved to be effective and I had fun chasing a number of quality bows downstream to land them.

Blake reported that he had good luck nymphing upstream also. The caddis action lasted for about an hour and a half before Blake and I hopped back in the boat and headed downstream. We laughed and joked around on our way to the takeout and coaxed a few more fish to hand on the way to the takeout.

All and all we had a better day than I could have expected, where the Lower Yuba proved to be the jewel that it is. We saw lots of purple and white lupine, poppies and many other spring flowers and of course fish to hand.

Clay

Rigging for the Dead Drift/Soft Hackle Swing

This is how I rigged up for the dead drift, soft hackle swing method:
(1) Start with a standard 9 foot, 4x tapered leader.
(2) Add about 24 inches of 4x to the leader using a surgeons knot. (1st Section)
(3) Add another piece of 4x tippet 24" long (2nd Section) with a surgeons knot leaving about 6 inches of the downstream portion of the 1st tippet section long to enable you to attach a dry fly or emerger.
(4) Tie on a caddis dry or emerger of choice at the 6" tippet section extended from the knot.
(5) Tie on a piece of 5x tippet (3rd section) from the 2nd tippet section also leaving about 6 inches of the downstream portion of the tippet section. Tie your favorite caddis emerger or soft hackle to match the hatching caddis to the 6" tippet section extended from this knot.
(5) Tie your favorite caddis beadhead nymph to the end of the 3rd tippet section.

You are good to go.

Presentation

(1) Extend your line so that you are delivering your flies from about 3 to 4 rod lenghts.
(2) Cast straight across (90 degrees) or slightly down angle
(3) Make a big upstream mend as soon as your cast lands.
(4) Dead drift the flies downstream and then let the flies swing back to the position directly below you.
(5) Make smaller upstream mends as the flies swingto adjust the speed of the swing.
(6) Keep a small loop of line pinched in your fingers ( 8 to 10 inches).
(7) If a trout takes let the loop of line slip through your fingers and raise the rod tip.
(8) Hopefully, land said trout.

Glossosoma Caddis - Saddle Case Maker Caddis

On the Lower Yuba River in years when we have drought conditions, as we have had late this spring and early summer, there is a hatch of bugs that often has us asking ourselves. "What the heck are the trout eating?" The rise forms are subsurface, sometimes a fish will rocket out of the water like a missile. Is it an early season caddis? In most years the late spring and early summer typically have high flows due to seasonal storms and then water being shipped for rice or for other obligations. The river runs too high to even notice what bugs are around. Some years you'd never even know that the March Browns are happening. This is also the case with early season caddis, most years you'd never even know they are there!

This year is different, there have been drought condition flows all this late spring. The early caddis have become players once again. It was time to go back to "Bug Detecting". I got out my bug screen out last week and found lots of caddis larva, cream and tan.  I also screened cases from hatched bugs in the flow that were amber colored. There are lots of domed shaped cased stuck to the rocks in the Lower River. I've turned rocks and screened bugs and picked the domed shaped cases apart that are glued to the rocks. These tan/amber colored larva are Glossosoma Caddis. Their common name is Saddle Case Maker Caddis.
Here's information that I have dug up.

"In almost every tumbling coldwater stream in California lives an insect that is very important to trout  throughout the late spring and summer. When you've been turning over rocks you've probably noticed all those little gobs of pebbles glued to in-stream boulders. They look sort of like barnacles. These scabs of pebbles also give a reference to high water levels. All of these clusters of pebbles are used to house an immature Glossosoma caddis".

"The Glossosoma are a member of the Family Glossosomatidae, the most primitive of all the case making caddis. These caddis have  a unique technique of building a home. Most caddis larvae make tubular homes that they simply extend as they grow. The Glossosoma builds a pebble covered dome that must be discarded and replaced as they mature. Sort of like a kid outgrowing his pants".  This fact is what leads them to be important to the fish and the angler.

Glossosoma Larva

"At dusk or dawn, large and in some stream huge numbers of Glossosoma larvae crawl out of their shelters and release themselves to the current. The numbers can be staggering. In one survey done by the late, great Gary LaFontaine, Glossosoma larvae attained drift rates of 350 insects per hour through a one square foot portion of river. Gary calculated that a trout with a three foot feeding area was seeing up 1,600 drifting larvae in one hour. LaFontaine concluded that during certain times of the year, Glossosoma create very selective feeding of the trout". They lock in to the Glossosoma caddis.


"When it is time for the larva to build a new home they crawl out of their too small abode and release themselves into the drift. The larvae might drift for a few feet or a few hundred yards before it lands on the streambed. It quickly begins gathering gravel and within a few  hours has built a new home. This home is dome shaped with a hole on the bottom at each end of the dome. Across the bottom of the dome is a belly band woven from silk".

"The larvae crawls and grazes on a rock while carrying the domed house along with it, searching for algae and plankton upon which to feed. The larvae might travel one direction for awhile then turn around inside its case, stick its head out the opposite hole and continue on in another direction. After a week or so, the case once again becomes uncomfortably snug and the larvae once more vacates its home and casts its destiny to the current". Once again making themselves available for the awaiting trout.
"Some segment of the Glossosoma population is doing this every dawn and dusk throughout the late spring and early California summer. The heaviest drifts are said to occur about an hour after sunset".

Glossosoma Pupae

"At some point the larvae decide it’s time to pupate. They aim the holes of their home so the current percolates through, providing a fresh flow of oxygen. Then, for the final time, they glue their case to the rock upon which it sits. This affixing of the case to the cobbles and boulders of the streambed is excellent insurance against getting inadvertently swept into the drift. It also spells certain death on our Lower Yuba should the powers that be who regulate the releases at the Englebright dam decide to abruptly drop the water level exposing the pupa glued to the rocks. This could be the case this year due to river fluctuations".


"After several weeks of pupation, the pupa chews itself free and emerges from the pebbled dome, sometimes in the morning but more commonly about an hour after sunset. These size 16, sort of burnt orange colored pupae are very active swimmers. They often congregate in the soft water immediately downstream of riffle areas. The pupae hide among the cobbles during the day, but at dusk they emerge to swim about in an erratic jinking movement".

"One or two evenings after emerging from their rocky homes, a pair of sparkling bubbles develop just under the pupal skin at the shoulders. Possibly aided by the buoyancy of these bubbles, the pupae swim to the surface, drift a short distance (about one minute) then the adult pops out and immediately flies upstream".
"About an hour after sunset, adult Glossosoma caddis return to the river to lay their eggs. Glossosoma are one of the many caddis species which crawl and swim underwater to lay their eggs on the streambed. Having lost their gills, the adults are obligatory free air breathers and must carry their oxygen supply with them. This they do by cloaking their entire bodies in a bubble of air".
"The bubble feeds oxygen to the caddis as it swims and crawls about the streambed. As the oxygen is consumed, the pressure differential shifts and oxygen from the water is drawn into the bubble thus replenishing the caddis’ supply. The bubble encrusted caddisflies look nothing less spectacular than sparkling, animated diamonds. In the relative dark of the evening stream bottom, the bubbles reflect any available light and seem to glow from within. To say these guys are highly visible is a gross understatement".

Information derived from Ralph Cutter's www.flyline.com and "Caddisflies" by Gary Lafontaine
Tactics for the Glossosoma Caddis

In many Sierra streams, just about every evening of early summer starting about an hour after sunset, #16 pale colored larvae free themselves from their homes and drift, en masse downstream. On the Lower Yuba these larvae are cream or light brown in color. Shortly thereafter, #16 burnt orange or purpilish colored pupae emerge from hiding and start swimming about. Many of these sport sparkling bubbles of air and ascend to the surface and emerge. Only a short time after that, #16 brown adult caddis from an earlier night’s hatch return to the river and travel about the stream bed to lay their eggs.
The typical fisherman experiences this sequence initially by seeing a sudden burst of caddis adults winging their way upstream. There might be thousands of bugs. At the same time, trout are rising, slashing and flashing about at or just below the surface. Many excited anglers tie on a #16 elk hair caddis and presents them on the top of the water for about twenty minutes until the rises stop and the caddis disappear. Rarely do they catch a fish. This is a common result for many anglers fishing the evening caddis hatch.

Birds Nest
First Phase of the Hatch

To be successful stay out late and fish until about an hour after sunset. Start by tying on a #16 orange, pink or cream colored larva imitation. Ralph Cutter recommends to use a Bird’s Nest as most people carry the pattern and they work pretty well. Add some split shot and high stick the imitation downstream in a drag free drift right along the river bed. You are imitating the helplessly drifting larvae. Trout will be looking for the larva in the drift along the bottom.

Glossosoma Larva

Second Phase of the Hatch

When the first trout rises and you see dorsal / tail rises, or you start to experience a burst of caddis activity, you will want to try a different tactic. Tie on a #16 Birds Nest or caddis pupa pattern and a small split shot. Rub the fly in powdered floatant and lob it out and across the stream. The nymph will be buoyant from the floatant but the shot will help it break the surface. Actively retrieve the fly with a twitchy and erratic strip. You are imitating the actively swimming pupae. The fish focus and concentrate on the emerging pupa. They rarely if ever take a dry imitation on the surface. All those rising, slashing fish you’re seeing are NOT taking adults, they are feeding on the pupa just under the surface. They will ignore a caddis dry floating on top of the film.


Deep Sparkle Pupa

Third Phase of the Hatch
As soon as the fish stop rising, use this as the key to switch tactics again. There may be lots of caddis in the air but once the fish move down in the water column you must present your flies back on the bottom. Take another Bird’s Nest or other diving caddis pattern, make sure it is bone dry, and treat it with powdered floatant. Fish the flies along the bottom of the riverbed with little or no drag. The rises stopped because the trout settled back down to the streambed to graze on the highly visible and vulnerable caddis adults egg layers.

Another Option - Fish a Caddis Cripple
If you’re in the mood for some dry fly action try using a Caddis Cripple pattern in a size #16. One great pattern for this is Cutter's E/C Caddis.  Its shuck-trailing, bicolor body supported by the flared wing and parachute hackle makes the E/C caddis (Emergent Crippled caddis) a great match for the crippled Glossosoma. Another great pattern is Craig Mathews' X-Caddis. The Glossosoma caddis do a very efficient job of emerging, but enough don’t survive the transition and a percentage of the adults gets trapped in the pupal shuck. This presents an opportunity for fishing a cripple pattern.


E/C Caddis

You can also fish a Caddis emerger immediately following the caddis hatch. It is also a good choice to use it as a searching pattern earlier in the late afternoon and evening prior to the fish rising. Fish seem to be attracted to a dead drifted cripple and will often suck them in even while other types of insects are in the drift. When you see caddis in the bushes in the early summer a Caddis Cripple is a great searching pattern prior to the hatch.

Wednesday, April 23, 2014

The Snap T Cast - Spey Casting 101

The "Snap T Cast" is a two directional cast. One in which the fly will anchor on the upstream side of the caster. Therefore this cast provides a level of safety when you encounter an upstream wind. This will prevent you from wearing an "Intruder Fly" earring. This cast also is good when you encounter limited backcast room. This cast can be set up with a minimal "D-loop" behind the caster if necessary.

The "Snap T" cast was developed by Pacific Northwest anglers, George Cook, John Farrar and Dec Hogan. It is used as an alternate to a "River Left", "Single Spey" cast. This cast is quite east to master and is great for when learning to spey cast.

Here is a video of spey casting teacher extraordinaire, Bill Lowe.


The video is pretty good wouldn't you agree. Thanks Bill.


So back to the why, when and how, 

When to consider using the "Snap T" 
  • Upstream Wind
  • Limited Backcast Area
  • Makes little disturbance on the water
  • Minimizes line positioning and maximizes fishing time
Situations when to use a "Snap T" cast for a Right Handed Caster
  • Single Spey From "River Left" with an upstream wind over your strong shoulder (Right Handed)

  • Reverse Single Spey from "River Right with an upstream wind over your off-shoulder (Kackhanded)
Fundamentals of the Snap T Cast

  • The principal of the Snap T cast is to bring the rod and line partially upstream, then imediately "snapping" the rod to the starting position in a ">" move. 
  • The "snap" will flick the remaining line, leader and fly upstream. 
  • After the fly lands upstream at the anchor point, the rod is swept around and upstream and circles up and into the forward cast.
Here's the steps involved with throwing a Snap T cast
  1. While standing on the left bank, "River Left", Start with your normal hang down length, (hang down is the amount of line out of your rod tip when you start a cast), laid out straight at the end of the dangle. Face your shoulders in the direction of the forward cast and hold the rod tip low to the water surface with your right hand on top.
  2. With the rod tip in a low position, sweep the rod from left to right on a slight incline eventually rising close to 30 degrees from the horizontal, or about at eye level.
  3. The rod inclines on an incline sweep and rotates about 90 degrees from the start position, (basically pointing straight across stream). Without hesitating, the rod tip is redirected downstream and back towards the starting position (or back towards the downstream bank) with a "V" shaped "snap" This "snap" drives the remaining front portion of the line off the waters surface and to the anchor point slightly above the path of the forward delivery.
  4. After the "snap" is made there is a slight pause as the line leader and fly position to the anchor point, about a rods length upstream and slightly forward of the caster.
  5. As the fly anchors, the rod sweeps upstream low to the horizon until it crosses the path of the intended cast. In a continuous motion the rod drives back to drive the "D" loop or possible a "V" loop, 180 degrees from the target line. The rod circles up to form a "D" loop and then smoothly accelerates into the forward cast.
Get out and practice until you've got it right.

Tuesday, April 22, 2014

Bugs - Mothers Day Caddis - Brachycentus Caddis


When I think of the Mothers Day Caddis which is the American Grannom of the Brachycentrdae family of caddisfly, I think of the day I had on the Lower Sacramento River in April a few years ago.

I was checking out the message board for NCFFB and came across some photos that had been taken the day before. There were rafts of caddis flies in the photos, I mean thousands.I called "The Fly Shop" in Redding to see what was up. They told me that the spring caddis were coming off big time and that it might last a week or two at the most. When this happens on the Lower Sac the hatch can be over in 10 days or linger on for a number of weeks, but that the massive blanket hatch can be over in 4 or 5 days on some years.

With that said, I called up my friend Blake and we headed up to Redding the next day. My son Zack played hooky and came along too.We put in at the Posse Grounds and rowed upstream to the riffle below the bridge upstream of the put-in.

We were early so I parked the boat and Blake and I got out and fished the riffle, wading into position to fish nymphs under indicators. I had a number of bumps once the caddis started popping and a couple of solid hookups. I landed one beefy bow after just about going for a swim when it took off downstream and I had to follow it down. I fortunately was able to land the fish and stopped and thought that was fun, but I really don’t feel like swimming today. I noticed a Fly Shop guide boat with clients working the run below me. It was a run about 300 yards long and they would row up, get set up and side drift the whole run eddy out, row back up and do it again. They were hooking up if not every time, most of the time, sometimes doubling up. After 45 minutes or so, we hopped back into the boat and I parked at the head of the run and anchored. When the guide rowed back up I asked him if he minded if I’d hit the run when they were at the bottom. He replied go ahead as they were headed downstream pretty soon any way. We took turns side drifting the run for awhile until he headed down stream and we had the run to ourselves. Moral is, ask and you shall receive, don’t ask and you’ll get dirty looks.


We were rigged up with Fox’s Springtime Pupa, Hogan’s Spring Fling pupa and some Soft hackles I had tied with peacock hurl bodies. We started fishing the run and had one of the most memorable days I’ve had fishing in Northern California. We fished this run and then crossed over and fished from river left and had similar luck. Our only problem was that our truck was 7 miles down river at the Bonnieview takeout. We could have fished there all day and then just taken out where we put in. Oh well, we still had a great day fishing on down to the takeout.

So, next year check out "The Fly Shop’s" fishing reports starting in mid March and through April tie up some flies with peacock herl bodies and make a point to hit this hatch.

Clay

Monday, April 21, 2014

Sea Lice, Estuary Lice or Freshwater Lice?


I was was fishing with Blake Larsen last week and a number of fish caught had lice on their gill plates. This brings up a couple of thoughts to ponder.

Are they sea lice, estuary lice, or freshwater lice?


I have often heard of these lice being referred to as sea lice. But in order for the lice to be sea lice the caught fish would have to be a steelhead that has gone all the way to the ocean. We have heard from researchers that only as little as 5 to10 percent of the Lower Yuba fish make it to the ocean. This has been documented by a scale survey done a number of years ago. So, if they are sea lice then this fish was one of that percentile.

I have also heard from fishery biologists that a percentage of Lower Yuba fish that have anadromous genes run to the estuary waters, feed, and then run back to the Lower Yuba. If that is the case could this fish be a steelhead that doesn't make it to the ocean, but goes as far as the delta saltwater? Could the lice be estuary lice?

Lastly, it has been documented that most of the Lower Yuba trout are resident fish and move in and out of the Lower Yuba, sometimes into the Feather and back and forth during the high flows of winter and back in the spring. Could this have been one of these fish? Could the lice be freshwater lice?


The lice present interesting points to ponder. I don't have the answers. Any thoughts?

Clay

Sunday, April 20, 2014

Lower Yuba Flies and Fishing 04-15-13

The Lower Yuba finally is coming into shape after weeks of high and off color water. I was able to float the river with Blake Larsen on April 15th. The flows were just under 4000 cfs. We had found last spring that when the flows are at about 4,000 cfs with about 3 feet of clarity the river starts fishing. You need too watch the CDEC flows and when the river's flows are right, get down there.

With that said, wade fishing will be tough. You'll have to pick your spots and wade carefully.
You'll need to look for areas where the water is running at a medium paced walking speed or less, there are areas along the willow lines that provide this speed as well as in the inside of runs. Eddy pools and back channels are also good bets. Just don't wade too deep or into the faster currents unless you want to go for a swim.

With a boat you can float the river and cherry pick the good holding water. You're looking for the same types as mentioned above. In addition, run a nymph setup through the softer side of riffles where the water isn't raging. You may be surprised, we were.

As far as flies and rigging goes, when these spring flows are happening, I always go for a rubberlegs pattern set up with a deep nymphing rigg. If you've been fishing the river in January and February, the Skwala Stones where happening and the Lower Yuba trout will jump on a big ticket item like a big stonefly, thus the selection of a rubberlegs. I'm a believer that this time a year you want to use a big attractor fly as your point fly and a rubberlegs does the job.

Let's talk about this for a bit. I have been fishing a "Natural Roe", "Troutbead", since September. When I rigg up a indicator nymphing rigg, I've got one on somewhere. It has produced in every month since September, that's almost 6 months in a row. With that in mind I created a pattern I'm calling the "Hot Head Spring Thing". It's an attractor. The triggers are (1) a Hot Orange metal bead, (2) Jay Fair Peacock Chenille, (3) Montana Fly Company's Speckled Centipede Legs. Three proven attractor ingredients. I'm wanted a fly that would come tumbling down the river saying, "Eat Me". I think that this does the trick. I tie this on at the point with a non-slip mono loop.


We've heard reports of march brown's coming off so I thought we would trail a nymph of the day, like a March Brown nymph (photo at left) or a Bird's Nest. You can also use a pheasant tail. We primarily used the Pheasant Tail and it worked.


As a third fly, we tried a few different nymphs like a HBI nymph which represents a PMD. This is one of my proven patterns for the PMD's on the Yuba. Some people say it doesn't work for them, but I'll tell you it does for me! One thing that I do consistently is use more shot than most people and I really believe that makes a difference. It keeps the bugs down in the zone.


As an example, we used a deep indicator rigg with a large thing-a-ma-bobber, about 6 to seven feet of 1x to the shot (lots of it), 18" of 2x to the rubberlegs, 3x to the Pheasant Tail nymph and 18" of 4x to the HBI nymph. This is a spring high water limited visibility rigg. You can go heavier than latter in the spring as the clarity improves. This rigg worked!


We also used a brown rubberlegs with a chenille that had a little sparkle in it with success. Does the color of the rubberlegs matter? Maybe, maybe not, we used these two and they both produced. The thing that is important no matter what color you use, is to use enough weight to keep them down in the zone with the high flows. You want to have the thing-a-ma-bobber sucked down into the water column. No matter what fly you use, none will be effective if they are being buoyed up in the water column because your rigg is under weighted.

All and all we had a very productive day, caught fish where we thought they would be, didn't catch some where we thought the might be, and caught a few in areas that surprised us.

That's fishing, Lower Yuba fishing.

The Single Spey Cast - Spey Casting 101


The "Single Spey" is a two directional cast. One in which the fly will anchor on the upstream side of the caster. Therefore this cast provides a level of safety when you encounter an upstream wind. This will prevent you from wearing an "Intruder Fly" earring. This cast also is good when you encounter limited backcast room. This cast can be set up with a minimal "D-loop" behind the caster if necessary.

When to consider using the "Single Spey" 

  • Upstream Wind
  • Limited Backcast Area
  • Makes little disturbance on the water
  • Minimizes line positioning and maximizes fishing time
Situations when to use a Single Spey Cast for a Right Handed Caster
  • Single Spey From "River Left" with an upstream wind over your strong shoulder (Right Handed)

  • Reverse Single Spey from "River Right with an upstream wind over your off-shoulder (Kackhanded)
Fundamentals of the Single Spey Cast

  • Start with a "Shotgun Lift". This is the most popular lift, it is easy to master and provides a smooth anchor placement.
  • Start with the line straight on the dangle and extend the arms slightly with the rod tip at the waters surface.
  • Begin lifting with the rod butt by raising both arms vertically until the top hand is at eye level. This is the top of the lift.
  • Do the rise smoothly and with enough effort to raise about half of the working line.
  • In a seamless manner, follow with a smooth shallow dish movement of the rod tip as the rod sweeps the line up river.
  • In doing this the top hand lowers sightly, applying enough thrust to clear the remain line on the dangle.
  • The slight downward dip will develop a strong thrust into the lift.
  • The rod as it is sweeping through the shallow dish, dips downward slightly from the top of the shotgun lift position, then curves upward on an incline as it circles around to drive a "D" loop.
  • The top hand drives back, rising to where the palm of the top hand is adjacent and level to the ear.
  • The "D" loop forms and the top hand drives forward ending at the stop with the thumb of the top hand at eye level. 
  • This results in a straight and smooth forward delivery.
Added Thoughts
  • Pick a target line on the opposite bank slightly diagonally downstream.
  • Use this line to establish the “D Loop” 180 degrees opposite from it.
  • If your “D Loop lands downstream of this target line you will cross it and tangle on the “Forward Cast”.
  • This is a “Touch and Go” cast which is an airborne anchor cast. As soon as the end of your fly line touches at your “D Loop” position, and you have reached the "Set Position", start and execute the forward cast.
  • Make sure the line touches and does not stay airborne.
Summary

The "Single Spey" is one of the basic casts that you need in your arsenal of casts and you will find uses for it in many fishing situations. 

It is a great advantage to take a lesson and have a knowledgeable instructor help you master all the basic casts. Fly Fishings Traditions' classes or individual instruction could be your ticket to the spey world.

You can contact Clay at clayhash.fft@gmail.com to arrange for personal instruction.

Saturday, April 19, 2014

Hot Head Spring Thing Rubberlegs


I finally made it down to the Lower Yuba after it seems like a month and a half. Probably more like a month. The river has finally settled down, and even though it still running over 4,000 cfs the clarity has improved a bunch. Last spring we started fishing the river again once it reached 3500 cfs. I just couldn't wait!

I had tied up a rubber leg stone fly, using a Spirit River "Hot Bead", lots of lead, Montana Fly Company Yellow Speckled Centipede Legs and Jay Fair's "Peacock" short shuck chenille. This is a variation of a fly used on the Klamath River by Craig Neilson. The Lower Yuba trout have a distinct fondness for eggs and I like just about any fly with peacock herl, so I came up with the "Hot Head Spring Thing".

Blake Larsen and I fished the river on tax day, April 15th, and gave the pattern a thorough run. Now I'm not sure if the fish were just hungry and aggressive, but it worked pretty darn well. I'll give it another go next week.

Recipe:

Hook: TMC 200R 3x long
Thread: Black 6/0
Lead: .025 Round Wire Lead Free
Rubberlegs: Montana Fly Company "Speckled Centipede Legs" Yellow
Chenille: Jay Fair's Short Shuck "Peacock"

Brown/Gold Rubberlegs

The other fly that worked equally as well was a rubberlegs tied with a brown/gold chenille. This one was tied with Montana Fly Companies Brown, "Speckled Centipede Legs". This fly worked really well in the morning before the sun got brighter.


Friday, April 18, 2014

Casting Tune-up "Stop that Rod!"

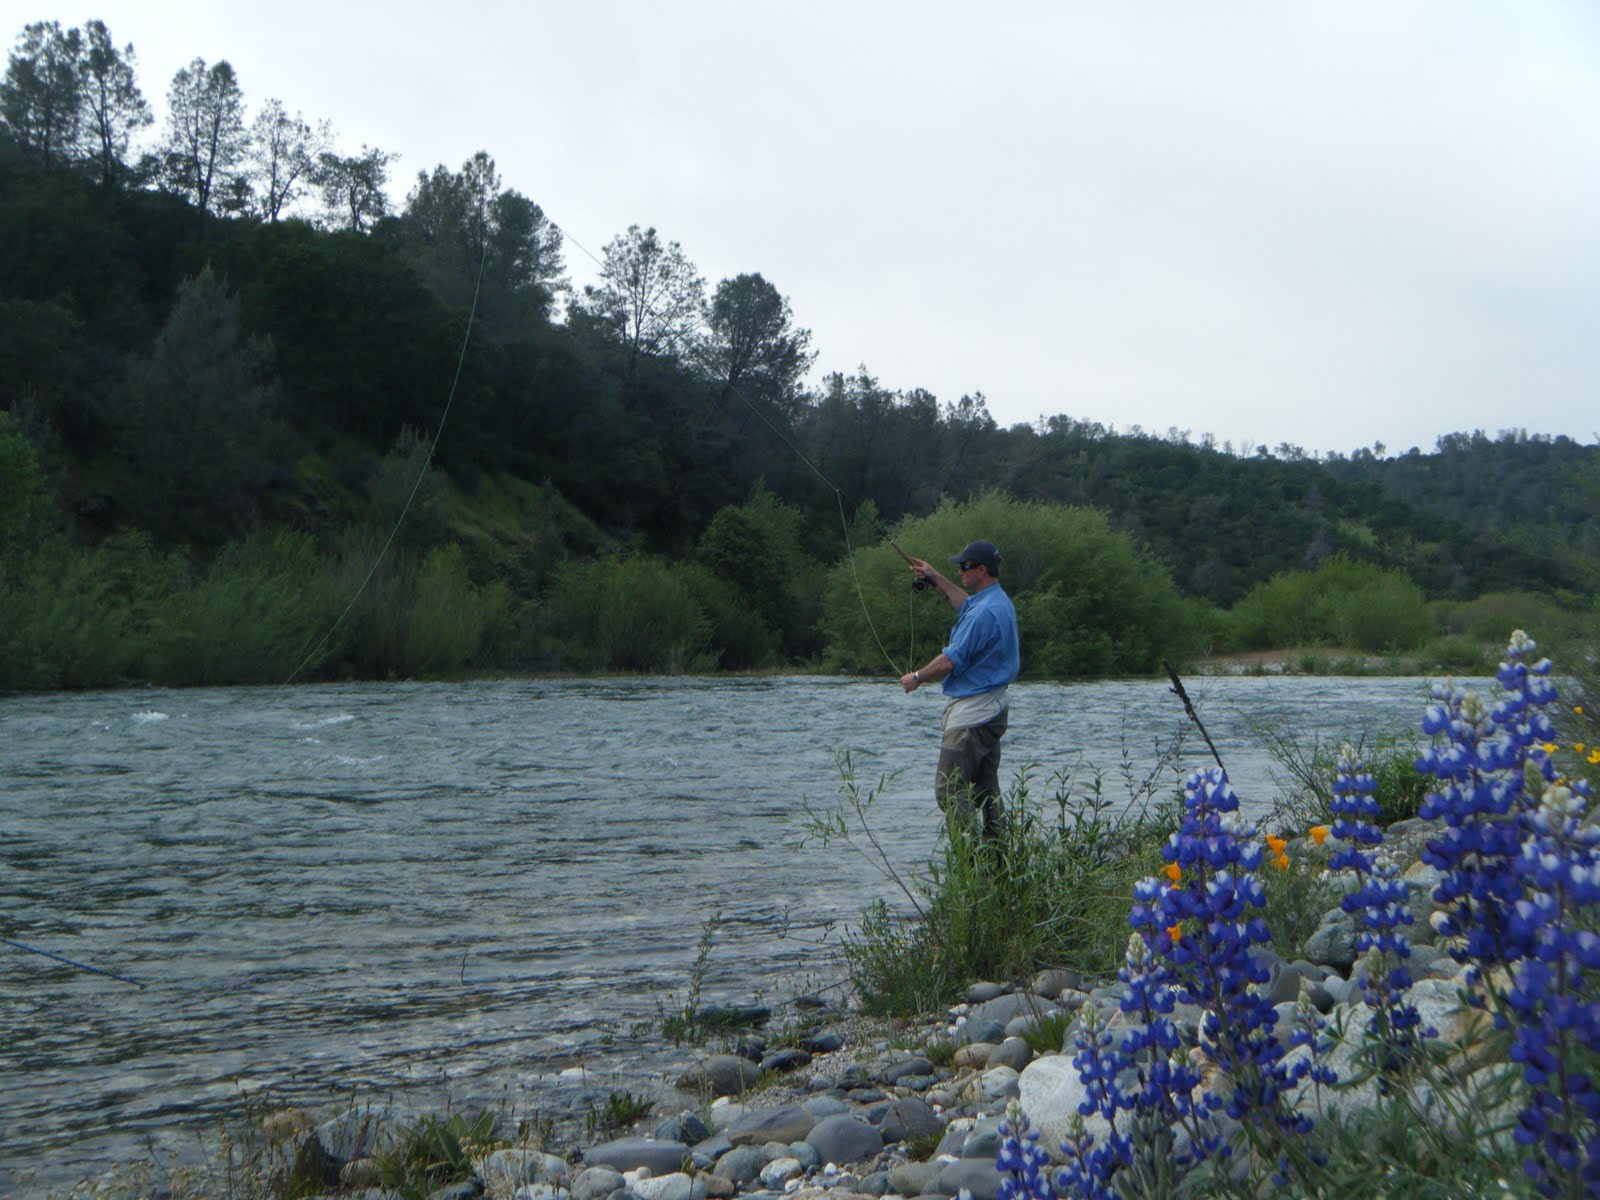
The trees are leafing out, the flowers are popping and spring time is around the corner. It’s about time to put away the shot and indicators and start thinking about throwing dries and soft hackles.
It’s funny, but I’m sort of a "stick to it" type of guy. This fall and winter I’ve been throwing nymphs and a few streamers with my switch rod and haven’t taken my dry rod out of its case but a couple of times. It’s been mainly nymphs under indicator or just with a tight line. Anyway you look at it, I’ve been “chucking lead”. I’m usually running three nymphs, and anyone that does much of this knows that if you don’t throw an open loop it’s going to be a real pain in the neck, literally.

So, I’ve got to make the transition to throwing dries and tighten up my loops and get the rust out of my presentation casting.

Anyone that fishes with me, knows that I’m like that guy that gets pulled over by the patrolman for not coming to a complete stop at the stop sign. My forward cast sort of just drifts though the stop. It always takes me a little time out on the lawn or on the river “Not Fishing” to get my loops tighter and my presentation casting in sink. It’s just not an automatic thing with me. I can get there, but I’ve got to put some work into it to get where it looks and feels like I know what I’m doing.

With this in mind, I recently read an article by Kirk Deeter and Charlie Meyers. They have just published a book titled “The Little Red Book of Fly Fishing”. It’s on my list for sure. The article was called “20 tips to help you cast Straighter, Longer and with more Accuracy”. I’ll give you a condensed version of some of their pointers. Maybe 10 instead of 20.

(1) Dare to be Different - Just because your casting style doesn’t look like your buddies, it’s not a problem. It just has to work for you, not anyone else. There are certain physical laws pertaining to loading and unloading the fly rod that must be adhered to, and the timing is critical, no matter what your stroke looks like. It’s the end result that counts.

(2) It starts with the grip – If you have ever received lessons in golf, most swing flaws can be traced to your hands and how you hold the club. This holds true with your fly cast. You need a firm grip. The line goes where the rod tip goes. (Burn this into your brain). Because of this, hold your thumb on top of the grip, and snap your casts, Visualize looking through” your casting thumbnail, odds are that the line will unfurl right through that window.

(3) Point Your Shots - As stated in (#2), the fly line and thus the fly follows the rod tip. Taking this one step further, the Rod Tip Follows the Thumb. So long as you keep your thumb (or index finger if you cast with it on top) pointed at the target your cast will go where you want it to go.

(4) “10 and 2 is too little too late – As we have heard from the beginning of our fly casting learning curve, our cast is to be imagined as if your rod moves along an imaginary clock face, with the forward cast stopping at 10 o’clock, and the backcast stopping at 2 o’clock. In reality, when we start casting, we are pretty much oblivious to this imaginary clock. It is advised to instead change the time zones to one o’clock on the backcast. If you try changing your way of thinking to “10 to 1” you may have better luck.

(5) Don’t get Cocky ( Your Wrist is what we’re talking about) – If you’re casting and you hear the noise of your line slapping the water behind you, it is often because your wrist is cocking too far back. As it relates to fly casting, the wrist versus arm equation is a difficult balance to master, let alone explain. Remember the arm is the engine, the wrist is the steering wheel. This pertains to aiming the cast, not powering the cast. Continuing the comparison to driving, if you let your wrist power your cast you will crash. A few simple fixes to help capture the right feel are; (a) Get a large rubber band, wrap it around your casting wrist, and then insert the rod butt inside that rubber band when you practice on the lawn. If you find that the rubber band is flexing too much, odds are you are breaking your wrist too far. (b) If you are wearing a long sleeve shirt, tuck the reel butt inside your cuff. This can really sharpen up and help you regain your stoke.

(6) Stop! …For Good Cast – Like I mentioned, this tip seems like it is shouting out to me. Often a little voice in my head says “What’s so important about stopping the rod anyway?” This is what’s up. Always remember that the stop is the key component, the one that makes all casting motion work. A good cast is built by gradually accelerating the rod forward, and stopping it precisely, then changing directions and gradually accelerating the rod backwards, and stopping it again to change course. If you don’t stop the rod crisply on the forward and backward strokes – if you just slush your way forward and back (wait a minute. Have you been watching me?) with no precise rhyme or reason – you can not load the rod. Your cast will droop, sag, flutter and die. The stop is as important a concern as any motion or power in your cast. Moral of this story. Stop with authority, forward and back, and you will cast farther straighter and more accurately. Amen!

(7) Hitting the Wall – This one’s for me, being a carpenter for most of my life. Think about a hammer and a nail when loading and unloading your rod. Imagine yourself between two walls, with nails on both. Using a two headed hammer, pretend to smack the nails, first on the back cast, and again when the hand comes forward. Each time you hit the wall the hammer stops cold. This is the stop motion that in fly casting causes the rod to unload briskly. In you stop cold, the line will shoot forward powerfully, with a tight loop. If you don’t stop hard and slush your rod through the stop, the line loses speed and distance and the loop will open up, making it susceptible to wind. To get full power from your rod, hit the nail on the head. So, I’ve got a new mantra. “Nail on head, nail on head…..”

(8) Watch that thumb – Another trick to help you stop the rod in the correct position, is to keep your casting thumb in your peripheral vision at all times. Lose sight of your thumb, and your going back too far. Simple as that!

(9) Throw a drink in my face – A good description of the gradual, controlled acceleration motion, that is the foundation of any good fly cast was offered by casting legend Steve Rajeff. Imagine throwing a glass of water toward another person. You don’t just chuck it. You lift it off the table, accelerate as you aim and then stop suddenly to let the liquid fly. Imagine that when you make you cast.

(10) Say Hello to good casting – Here is another tip to get used to starting and stopping the rod at the correct angles. Imagine you’re using an old wall telephone, standing a couple of feet away. Say hello when you bring your rod hand smartly back beside your ear, keeping your arm perpendicular, and then whisper goodbye as the phone returns to the cradle. Again, perform this with crisp stops and starts.

I know what I’ll be whispering to myself when I go to sleep tonight “Stop that rod….Stop that Rod…..”

Clay

Thursday, April 17, 2014

The Double Spey Cast - Spey Casting 101


The "Double Spey" is a two directional cast. One in which the fly will anchor on the downstream side of the caster. Therefore this cast provides a level of safety when you encounter an downstream wind. This will prevent you from wearing an "Streamer" as an earring. This is one of the easier spey cast to master. It can be done at a very slow pace. With that said , the cast must maintain a tempo that progressively accelerates into the forward stop position. 

The ability to form the "Double Spey" at a slower pace makes this cast ideal for sink tips. It is just a good overall cast.

For a right handed caster the "Double Spey" is one of the primary "River Right" casts.

For a right handed caster the "Reverse Double Spey" can be utilized from "River Left" and is thrown over your left, off shoulder or "Cack-handed".

Here's a You Tube video of casting instructor extraordinaire, Bill Lowe, as to how to make a "Double Spey Cast". 


When and why to consider using the "Double Spey" 
  • Downstream Wind - D for Downstream remember "Double Spey"
  • When you are fishing "River Right"
  • When using heavy sink tips 
  • When using bulky flies
  • Makes little disturbance on the water
  • Minimizes line positioning and maximizes fishing time
Situations when to use a Double Spey Cast for a Right Handed Caster
  • Double Spey From "River Right" with an downstream wind over your strong shoulder (Right Handed)

  • Reverse Double Spey from "River Left" with an downstream wind over your off-shoulder (Kackhanded)
Fundamentals of the Double Spey Cast

The "Double Spey" is broken down into two phases which makes it a two-dimensional cast. The first portion is a line re-positioning move from the dangle straight downstream followed by a "Switch Cast" to cast the line in an across the river direction. 

How to perform the Double Spey Cast


  • For a right handed caster the cast starts with the angler on "River Right".
  • The line on the dangle directly downstream.
  • Face your shoulders in the direction of the forward cast and to the target area.
  • Start the cast with the rod tip at low to the waters surface With the right hand in the top position on the rod.
  • The cast stars with a "lift and sweep" movement. This is a mild version of the "Shotgun Lift" as described in the "Single Spey". cast. The lift is done by raising the rod tip vertically from near the surface of the water to about chest high.
  • As the rod rises to the top of the lift in a continuous motion, sweep the rod with a low rotating swing from downstream to upstream, driving the loop of line upstream.
  • Use the rod but to drive the line positions to attain a smooth thrust.
  • The beginning of the sweep is where the maximum effort or thrust is applied to lift the line from the water. The amount of effort and/or height of the lift may vary with the length and type of line being cast.
  • The sweep is done with the rod held at a low angle with the tip about shoulder height, driving the belly of the line upstream.
  • The task is to sweep the line upstream far enough so the fly anchors just below the path of the intended final forward "Switch Cast".
  • The end of the fly line should be about one rod length downriver and slightly forward of the casters position.
  • As the fly sets to the anchor point from the initial "lift an sweep" move, the rod is redirected in a smooth transition downstream, folding the line over itself.
  • The rod returning downstream drives the line to the point where it crosses the path of the forward cast. In a smooth continuous motion the rod rotates to a new oath, in an inclining plane drawing back behind to 180 degrees from the direction of the forward cast and the target area.
  • It is very important that the "D"loop is in straight alignment to the forward cast.
  • The rod "Circles Up" forming an aerial oval which brings the rod to the "Key" position for the forward cast.
  • From the "Key" position accelerate smoothly forward as the passes vertical and thrust a flick into the stop. 
  • The loop forms and zips out well above the water, just as in "Switch Cast"
Summary

The "Double Spey" is one of the basic casts that you need in your arsenal of casts and you will find uses for it in many fishing situations. 

It is a great advantage to take a lesson and have a knowledgeable instructor help you master all the basic casts. Fly Fishings Traditions' classes or individual instruction could be your ticket to the spey world.

You can contact Clay at clayhash.fft@gmail.com to arrange for personal instruction.

Monday, April 14, 2014

The Switch Cast - Spey Casting 101


The “Switch Cast” is also referred to as the “Forward Spey Cast” is is like an energized Roll Cast.

Unlike the Roll Cast, the line never stops moving and is in constant tension. Like a Roll Cast, a "D" loop of line forms behind the rod tip, and the forward loop rolls out above the surface of the water.

This is a single directional cast which is also a non-change of direction cast just like the “Roll Cast”, but is much more dynamic. It may have limited use in actual fishing situations, but as an instructional cast it is very important. The "Switch Cast" is the essence of a Spey Cast. It has the basic elements of a cast.

  • The Lift
  • The Anchor
  • The "D" loop
  • And The Forward Cast.
After learning the "Switch Cast" the final delivery of any spey-type cast is mastered. Once you have mastered the "Switch Cast", when learning a new cast the line positioning moves can be the sole focus. All spey casts end with the elements of the "Switch Cast".

Here's a video showing both the "Switch Cast" and the "Single Spey Cast" from Tight Lines in NJ.


Anchor Types and Positioning


The Switch Cast positions or anchors the fly to the side of the caster to form an elongated "D" or "V" shaped back loop. The size, shape or depth of the back loop may change depending on;

  •  Choice of the style of casting, Skagit, Traditional, or Underhand
  • The type of cast you select to throw
  • Situation, lots of room, moderate room or little room behind you to set up the cast.
The Switch cast is valuable to practice mastering the various "D" and "V" loop sizes and shapes. Practice them all.


The Fundamentals of the Switch Cast - Three Steps

The Lift and Sweep
  • The “Switch Cast” starts with the rod pointed at the line on the water and then continues with a lift with thrust that smoothly and  progressively builds to the top of the lift which is to nose height or about to the 9:30 or 10:00 position.
  • The thrust becomes stronger as the rod smoothly swings into the dip at the start of the sweep, think of a shallow dish.
  • At the start of the lift, the rise of the rod and the dip that follows work together to enhance the strength of the lifting thrust.
  • The rise of the rod followed by the dip work as opposing forces.
  • The lift and dip must be smoothly coordinated and regulated so as not to disrupt the cast. 
  • An efficient cast will minimize the height of the lift and flatten the dip into a streamlined movement.
  • The dip or start of the sweep is directed and directs the momentum to the desired anchor point.
  • During a spey cast it is critical not to misdirect the path of the dip. The path needs to be controlled. Smooth movements are best.
  • Developing and regulating the amount of power or effort applied is very important.
  • The correct applied power and tempo allows the "D" loop to be placed properly and in the desired position.
.
Placing the Anchor Point

  • As a general rule the anchor point will be off to the side and slightly ahead of your position at about a rod's length away.
  • Place the rod in your right hand (for right handers) and extend and point the rod ahead, then tilt the rod tip about six to eight feet to the side. This is the target for your anchor.
  • The goal is to have the anchor point closely aligned with and parallel to the target line of the forward cast.
  • When setting up the anchor placement if it is skewed or misaligned the line will not clear smooth;y and may cause many errors. 
  • Work on getting the "Lift and Set" formed properly and you will then have better control of your anchor placement.
Developing a Proper "D" Loop
  • The "D" Loop is an aerial loop of line that forms behind the rod tip.
  • The "D" Loop, with the grip of the line anchored to the water surface is the resistance that loads the rod to propel the cast.
  • It is desired to have an oval "D" Loop or a "V" loop that is energized and maintains constant tension.
  • A "D" Loop forms with an incline sweep of the rod that drives the back loop well above the water and will help increase the dynamics of the cast.
  • The "D" Loop should be positioned 180 degrees from the target
  • When transitioning from the "lift and set" the rod drives and sweeps back and "Circles Up" to form the oval shaped "D" loop behind the rod tip.
  • The "Circle Up" is an upward circular rotation of the rod to redirect the line to a new path to travel.
  • The "Circle Up" motion is vital to keeping constant tension in the cast.
  • The rod "Circles Up" to the "Key Position" where the rod accelerates smoothly forward towards the target
The Forward Cast
  • From the "Key Position" the forward cast starts
  • The lower driving hand pulls inwards towards the waist.
  • The upper hand extends forward as the elbow lowers and bends open
  • Stop the top hand at the 10:30 position
  • Use the upper hand a the "pivot" to become the "fulcrum"
  • This will "Flip the Tip" to allow the cast to fly to the target


Summary

The "Switch Cast" is the essential part of all spey casts. Practice until the power and tempo is correct. Get this right and the rest will come easier.