Fly Fishing Traditions


Fly Fishing Traditions Blog and Website
"It's about Life & Fly Fishing"

Saturday, November 29, 2014

Kingfisher Drift Boat Build - Drain Plugs


Now that the LineX bed-liner is sprayed on the bottom it's time to install drain plugs and wood inserts where I need to attached various parts to the bottom. The bottom is constructed with Plascore, a honeycomb plastic material. Screws will not attach to it. So essentially I have a 3/4" thick plastic bottom with Kevlar and fiberglass on both sides. I need to epoxy and glass in some epoxy sealed Okoume plywood discs to enable me to attach stuff.

I used 3 different sizes of hole saws mounted in a drill press to make the discs.

2 1/2" Diameter Discs. 

The first discs where 2 1/2" in diameter. These would be used for attaching pulleys for the anchor system. I will be inserting one in the transom and two under the front of the rower's seat. The ones under the rowers seat are placed butting up to one another.


Here are the two side by side holes under the rower's seat where a pulley will be attached. I used a 2 1/2" hole saw to cut through the top layer of Kevlar and fiberglass.

2' Diameter Discs

The 2nd set of discs were 2" diameter. These would be used to secure the foot brace brackets in front of the rower's seat. There will be 4 of them.


Here is a photo of a 2 inch diameter hole that has been drilled and then the plastic honeycomb removed 

The holes are bored with a 2' diameter hole saw just through the top layer and then the honeycomb core is removed by twisted the core out with a pair of needle nose pliers.


2' Diameter holes for the Drain Plugs

The drain plugs require 2 holes to be bored. I started off by drilling a 2" diameter hole through a piece of 1/2" thick Okoume plywood with a 2" hole saw. The holesaw has a 1/4" diameter pilot bit. Once drilled, I changed to a 1" diameter hole saw. I held the 2" disc in a clamp and used the 1/4" pilot hole to drill a 1" diameter hole inn the center.


The photo above shows the 2" diameter discs on the top row and the plug for the drain plug on the bottom. The brass drain plug is inserted into one of the discs.

Sealing and Installing the Discs

The discs were sealed with epoxy on all sides prior to installing them. They were then sanded with 120 grit prior to installing them. Once sanded I mixed up some epoxy peanut butter and epoxied the discs into their appropriate holes. The epoxy peanut butter was squeezed out of the holes as they were leveled. The epoxy was leveled and cleaned up and left to harden overnight. The next day I cut squares of fiberglass cloth and placed them over the plugs and flow coated them.


This photo shows the 4 - 2" diameter discs epoxied in place

Installing the Drain Plugs

Once the wooden discs had set up I had to drill through the LineX bottom. I used a 1" diameter steel bit. The bit scored the holes a bit so I recoated them with epoxy Once the epoxy had hardened the plugs were ready to be installed. The brass drain plugs were installed with 3M 5200 adhesive. The bottom flange and the outside surfaces of the drain plug were coated liberally. Once the plugs were inserted I used #8 x 5/8" brass screws to attach the brass drain plug to the wooden disc. I put 5200 adhesive in the screw holes.


This is a photo of the drain plug disc in the transom prior to drilling through the bottom. Note that the disc is about 3/16" below the surface of the bottom. This will flush out the drain plug flange.

Thursday, November 27, 2014

2010 Fall Fishing Tips - A Summary


The Fall Lower Yuba Summary

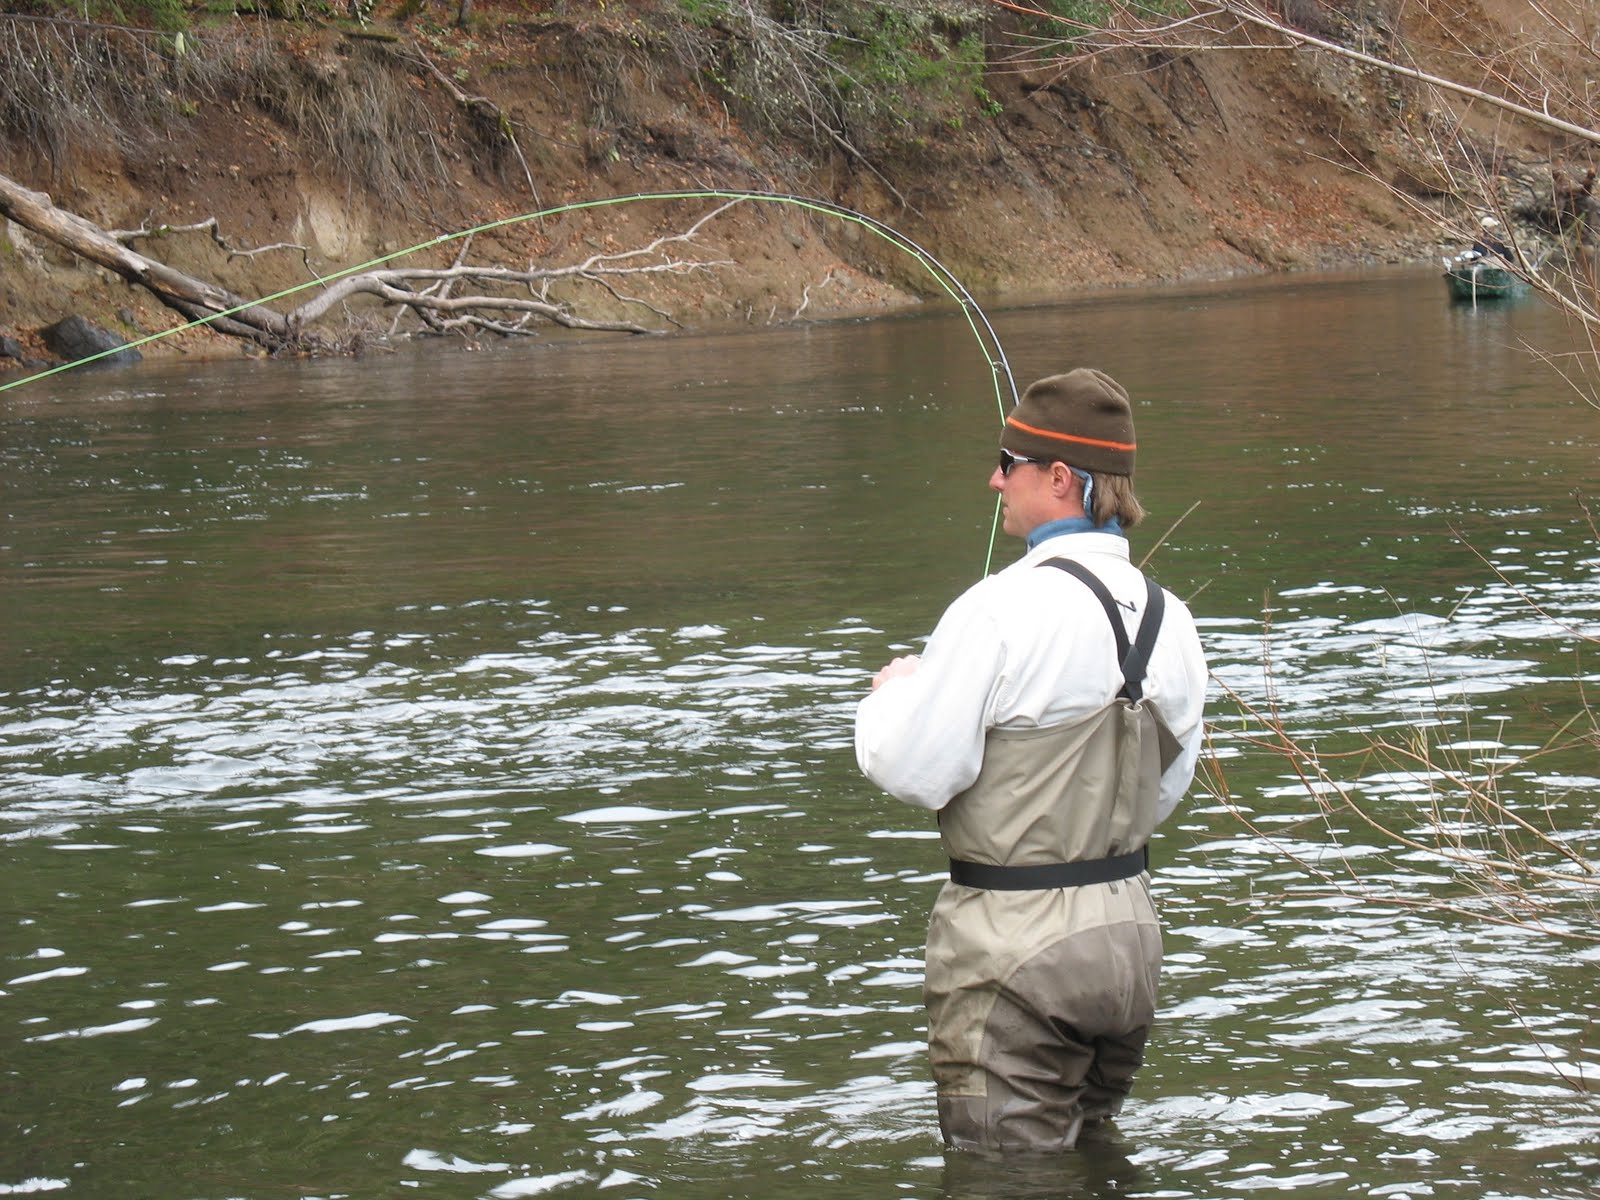
With the pounding we've taken prior to this Thanksgiving week, with snow storms knocking out power, breaking down oak and ornamental trees that still had leaves on them, I guess we can say winter has arrived. I'm sure we'll still see some Indian summer like days in December, but for all intents and purposes the fall is over and we need to look towards winter type conditions when heading out fishing. I thought I'd sort of sum up the 2010 fall fishing here on the Lower Yuba River.

The salmon came in early and in pretty big numbers, so the egg bite was pretty good. I made it out about once a week and so my experiences are based upon that. Some regular guides on the river have felt that it was one on the better fall seasons for the egg bite in a awhile. My experience was that it was a little tougher than last year, but like I said, I'm not out on the river everyday.

My conclusions after fishing the river pretty hard in the fall of 2009 and from this fall are as such.

  • I believe that when the salmon are in the system and the resident rainbows are staged behind them, the best fishing happens early in the mornings before the sun really gets high. This is especially true when the water is low running at 900 cfs +/- and gin clear.
  • The later the day gets and the more drift boats go down the tougher the fishing gets for fish staged behind the salmon and the river in general. First Down equals best fishing.
  • It is my opinion that the fish move into deeper slots or more aerated water for sanctuary as the day gets brighter and with more fishing pressure.
  • The above, I believe, holds true unless you get an overcast day. On overcast days the fishing can be consistent and the fish seem to be where you'd think they should be throughout the day.
  • Troutbeads are the Bomb, especially if you steal nail polish from your wife or girlfriend, for the troutbeads.
  • Don't forget about the bugs. The fish will still eat bugs, collect a sample, match the color and size of what you find, Stones, Caddis and Mayflies. Keep up good principles.
  • Don't believe everything you hear at the fly shop, or from your buddies, do your sampling, look to the river to tell you what to do, experiment and keep trying!

Tight Lining

This year I've started stripping off the indicator more often and using less weight and using tight line nymphing techniques in the rollers and shallow runs up to four feet deep. I have more confidence in using straight line casting techniques in the rollers behind the salmon and keeping tight to the flies. Cast on top of the bucket or drop off, using enough shot to tumble the flies down into the bottom of the bucket. If there is not take, pick it up and recast to the next likely spot. This method is of course from a moving drift boat. Using this technique also works just as well when wet wading. Just don't wade in the redds!

When the depth of a run is 2 feet to 6 feet, you can also fish it effectively tight lining, just make sure you put on enough shot. The amount of shot is the key. We have consistently had success in these depths when tight lining, but you must feel the shot bouncing on the bottom from time to time. If not add a BB. If not add another BB. Get the picture.

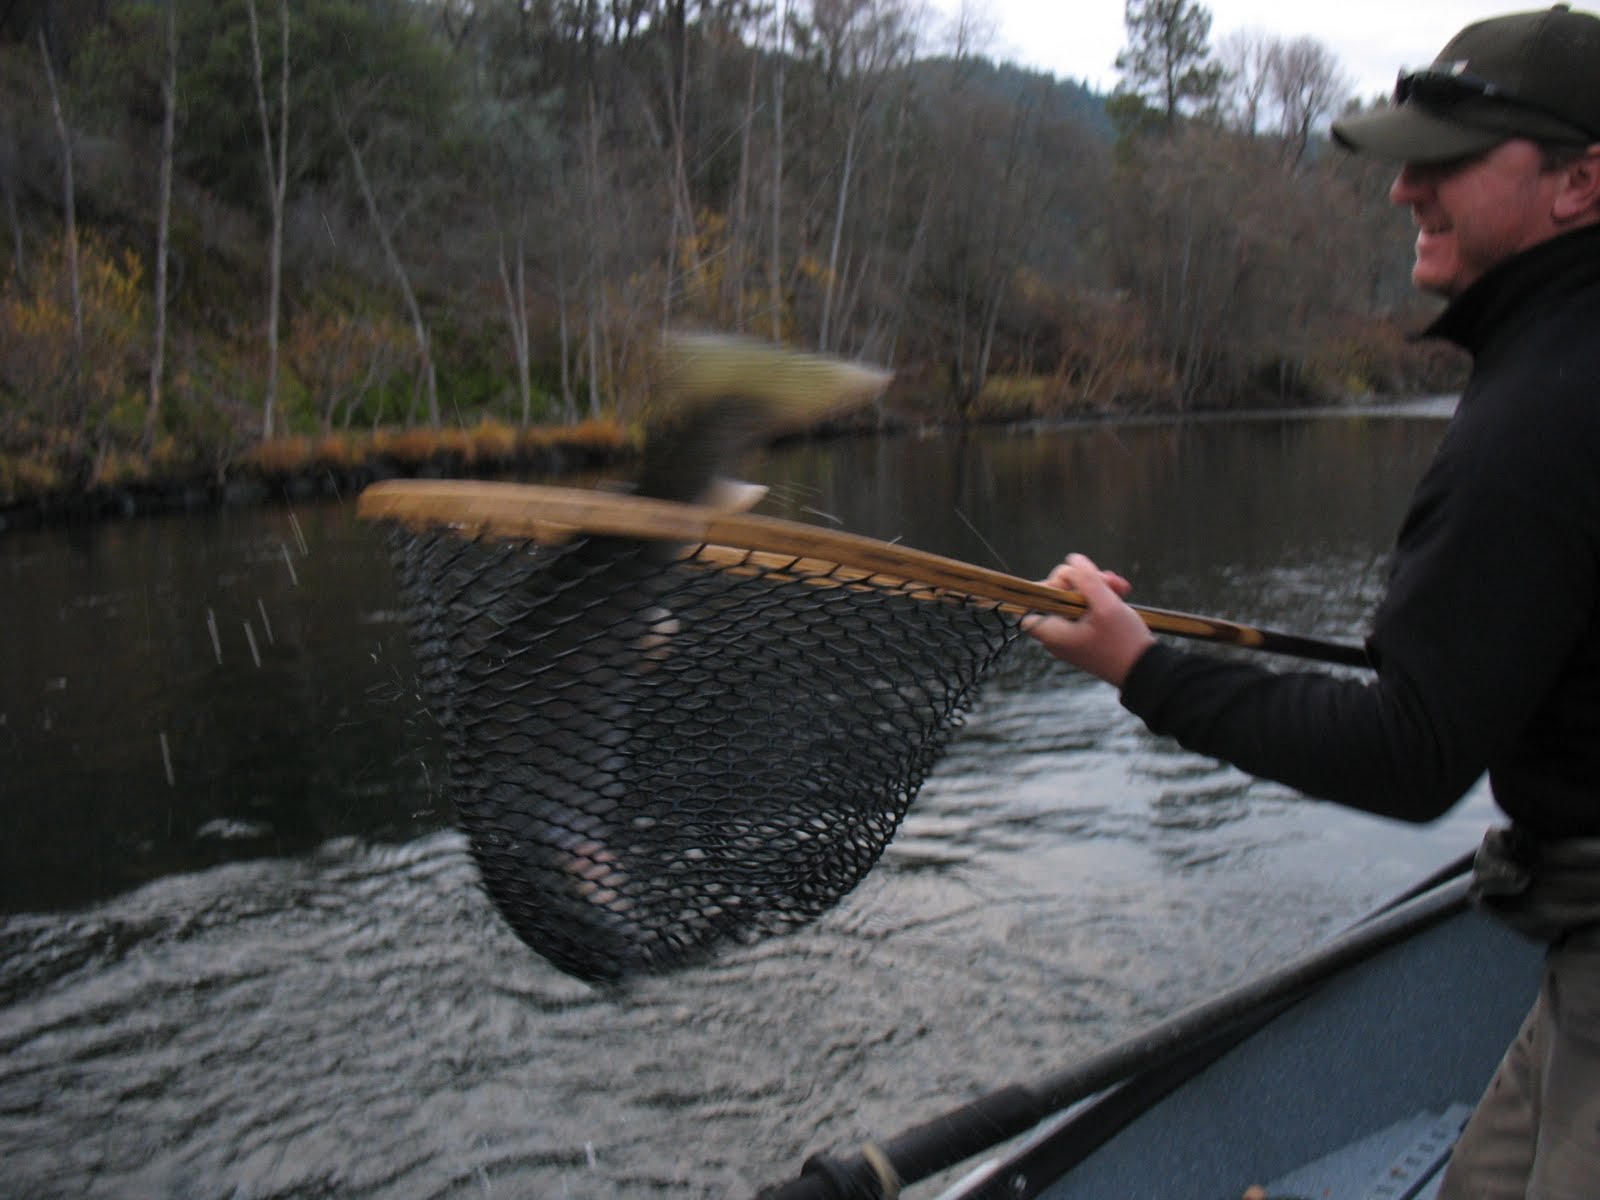
We picked up the some of the biggest fish of the year using tight line methods in 2 foot or less deep water.

Indicator and Shot Method

I still like to put the indicator right back on as I work the deeper runs that have a consistent depth of 4 feet or more, This is more of a bug bite thing than an egg bite, although the numbers of fish caught using this method in the runs, the eggs still out perform the bug imitations throughout the fall. Dead drift them, mend properly, make sure you've got enough weight on. You've got to get and stay down.

If I don't take the indicator off when fishing tailouts or buckets, I'll straight line cast it and fish it tight line as if the indicator wasn't there, If you do this you have to pick it back up and re-cast to keep it fishing correctly. Sometimes I'll do this if there is a quick tailout or some redds with a deeper run right below it. This is really just being lazy but as you know it's easy to let happen. Theory is one thing.

Typical Rigging

My Fall standard rigg for indicator or tight line nymphing is;

(a) Start with a 3x, 7 1/2 or 9 foot foot leader
(b) Add 18" of 3x tippet and put shot above this knot
(c) Tie on an egg pattern of choice
(d) Add another 18" of 4x tippet tied to the hook bend of the egg and then tie on a bug of choice.
(e) Add another tippet of 5x tied to the hook bend of the 1st bug and then tie on another bug which is usually the smallest one.

The typical sequence goes egg, attractor nymph, usually a caddis, and then an imitative nymph at the end. I'd usually rigg both anglers starting with and egg, one with a Troutbead and one with a Pettis Egg, and 4 different nymphs. Then we'll switch it up if we've found out what the trout wants on any given day.

This leader works for tight lining or indicator nymphing. Just add a Thing-a-ma-bobber.

The Flies

As far as discussing flies, I'm considering the fall starting when the salmon first started showing up this year in August, these were the occasional springer salmon that are in the system. It really seems that as long as there are salmon around, even if they are spawned out or pre-spawning, the trout will eat and look for eggs, much earlier in the season than you might think. For the most part if we see a salmon, an egg goes on. Once an egg goes on in the fall season, it pretty much stays on the whole season in different types, sizes or colors. It's what a guide friend says, "It's Steak and Eggs Time".

The Troutbeads still were the best egg imitation, especially if you take the time to paint them with finger polish. I had good luck using Pettis Eggs early in the season, but the Troutbeads out performed everything for the middle and end of the fall.

In early fall we had real good luck with copper johns, and just about anything black, a black Copper John, Prince of Darkness, AP Black, Hogan's Yuba Pupa, Fox's Poopah, pretty much any standard caddis nymphs in olive etc. We had some exceptional fishing these bugs with an egg as a dropper in the tailouts above the Parks Bar Bridge.

We also had very good luck in the early fall with eggs and the above mentioned nymphs, in areas of the river where the river tailed up in run, from say 8 to 12 feet to 6 feet. The fish would sit right at the bottom of the up lift and be staged for nymphs moving toward the lifting gravel. They would take eggs and bugs about equally.

As the fall progressed we typically used a Troutbead, an olive caddis, and then a mayfly nymph. Pheasant Tails, Hogan's Military May's in Brown and Olive, Hogan's Yuba Pupa, Fox's poopahs in cinnamon and green. We had luck with a Spitfire one day which was a first for me.

When we found that the water was off colored from a recent rain storm we would go, Egg, Rubberleg Stone, and then a nymph of choice. We had some real good days when the visibility was about 4 feet or so. The off color provides a level of stealth that you just don't get with the spring creek clarity of the river flowing at 900 cfs +/-. When the river gets that off color look, try to get out there the fishing. The fishing can be great and typically brings up the adult steelhead, or resident rainbows, whoever's opinion as to what they are, you want to listen to. All I know is that, they are bigger and are fighters. We managed a few of these to the boat and lost some we never got a look at, but that's fishing.

All told, it was a great 2010 fall fishing season with friends, and many stories told, fish caught and lost. Although, as always, work always seems to keep me from getting out as often as I'd like. Maybe that won't be the case next year.

Have fun out there!

Tuesday, November 25, 2014

Trinity River Steelhead

Thanksgiving Day, 2009 - Happy Holidays


It's finally feeling like winter is on its way here in Grass Valley. The air has a crispness to it that only comes as fall turns colder to winter. We're getting the organic turkey ready to put in the BBQ and family is on its way. My Mom and Dad are coming from Idaho and Laura's brother Mark and his family and kids are coming the day after. Zack is excited to have his three cousins over to play around with. The kitchen will soon be filled with the aromas of a savory dinner in the works.


My thoughts have been turning over the fact that it will be prime steelhead season on the Klamath and the Trinity River as soon as the weather really starts to turn and move in. November and December are usually the prime time. I really should hit the Trinity as I fished the Klamath with Zack about a month ago. In years past, I've hooked up with my friend and guide Mike Hibbard and fished the Trinity this time of year, but he's now booked every day from the beginning of October through some time in January. He has repeat clients that book the same time slot more or less each year. Sort of hard for me to comprehend booking a trip a year in advance. I always thought that when the steelhead were in and the time was right you headed up to Junction City and went fishing. What if the fish are not in? What if the weather is terrible and you'd be fishing in a snowstorm? I guess it's steelheading, you pick a day a year in advance, plan it and go. It could be epic, you may have to hunt down and find the fish and figure where they are in the system and if you get skunked that's also steelheading. I guess that's the way it's becoming with all the good guides on the Trinity. I guess I'll just have to hitch up my "Fishcraft" raft, get a couple of buddies to share the gas money and head up there one of these days.

I've heard from many sources that in the last couple of years the fishing on the Trinity has turned into "Combat Fishing," with it hard to find open water to fish. The steelhead runs have been very good the last two years so every one and their brother is there trying to hook up a steelhead. This is actually why I didn't go last year. The last time I went down the Trinty River, was two years ago in mid November, I went with my friend and fishing buddy, Blake Larsen. We were fortunate enough to hook up with Mike again. If I remember right, we were able to fill in a spot that was canceled by a client of Mike's. I got the phone call and we went. We got to the put in around Junction City at about 9:30 and there were a number of drift boats already on the river. We headed down the river in Mike's drift boat and there were other drift boats and wade fishermen in every slot and run for at least a mile, but it's kind of hard to tell distance when you're drifting along. As Mike rowed down the river he told us of a story where a guide from "The Fly Shop" in Redding showed up and rowed the whole river from the put in to the take out and was not able to find a spot to have their clients wet a line. That's what they mean by "Combat Fishing."


Mike was hoping that no one had got that far down stream yet and as we rounded a bend in the river Mike muttered, "All Right, nobody's home". We parked the boat and got out and started fishing one of his favorite runs. Anyone else coming down the river had to keep moving further on down and leapfrogging to find open water.


On that day, the weather was fairly warm and overcast, so we were looking forward to the possibility of a successful day. We were lucky enough to find this prime open slot and this run lately had good numbers of steelhead in it. We parked the drift boat, spread out and fished that run for what seemed like 4 or 5 hours. I stationed myself at the head of the run where the riffle dropped into a slot and Blake set up to fish the run futher down stream. I think I was "schooled" about five or six times before I finally got a nice steelhead in my hands. I was fishing at the head of the run feeding my indicator and flies downstream into the slot. There was a dropoff and the steelhead were stacked there. I was fishing with an indicator, plenty of shot, an egg, a sort of purple/blue Copper John and a Mercer's Poxyback Stonefly. The fish would hit, the indicator would go down, I'd set and all hell would break out. The fish would run straight at me. I was having a hard time managing my set and could not keep up with the steelhead running right at me. As soon as I got the slack under control and felt the fish, gone! They would shake out the hook. This happened about 6 times. Mike was coaching me how to strip set and keep my reel and stripping hand at my chest and try to set sideways and low. But for me at the time it was not computing. When a 10 pound steelhead hits everything that I was being coached with went out the window. Mike would just laugh at me and just would say "Keep after it, you'll get it." Eventually I did and started landing fish.


On this subject of setting and fighting fish, if you ever get a chance, you should check out a video by Kelly Gallop, "Streamer Fishing for Trophy Trout with Kelly Gallop". This video has a section where he talks about how to set and fight fish and talks about rod position and hand position. "Keep your hands in a box." His pointers are applicable to almost any type of fishing. It's the best example I've seen of what Mike was trying to work with me on the river. But once again, you may rationally think it through, but when a freight train of a steelhead hits, all the should of, could of, goes out the window. At least it was for me for a while, until my adrenaline settled down and I finally got the hang of it.


I was fishing with a Sage Z-Axis 6 weight and after I settled down I hooked a fish that went 10 maybe 12 pounds. I imediately thought why the heck didn't I bring my 7 weight. It took me down stream into a deep pool that was probably 20 feet deep. the water was crystal clear and this steelhead just dogged it on the bottom. I couls see the fish the whole time which made it sort of nerve wracking. It was like I was hooked to a log. I could hardly move it. Mike was coaching and said, "You've got to start pumping him up and putting pressure on him or you'll be there all day." So I did, I'd reel down and pump up, reel back down and pump up. I'd do this and slowly the fish would come up, only to race back upstream and then I'd have to start all over again. I finally was able to get it to come it up, but it still wasn't close enough to net and down it went again. By this time my forearms were burning and I seemed way under gunned with my 6 weight. I really thought I was going to break it. When I finally got it close again, the fly popped out. Gone! Mike just said, "Let's go get another one."


It the meantime, Blake was fishing below me in a section that was shallower and more of an even "walking speed" run. He would hook up and the fish would typically turn and run downstream. He was being much more successful landing fish than I was and he let me know it. That's what friends are for, right? The angle that Blake was fishing from enabled him to set sideways which provided a solid hook set and put pressure on the fish almost immediately. The fish hooked in this part of the run would either shoot upstream and then turn and gradually start moving downstream or they would feel the hook set and turn and go downstream immediately. He could then work the fish into shallow water and tail it or have Mike come down and net it. This current speed was also helpful to hooking, playing and landing the steelhead from this area. This is probably justification by me for not landing as many fish. But what the heck, I think it’s true!


Mike was kept busy coaching me and helping Blake and I land fish, once I figured out my hook set. We hooked and landed fish regularly, How many? To be honest I really don't remember but it was plenty. If I remember right Mike rigged Blake up with an egg on the point and then trailed with a larger nymph, like the Blue/purple Copper John, and then trailed that with a smaller nymph like Morrish's Anato-May. This I am sure of. The Anato-May was a hot fly all day.


We still had about 3 or 4 miles of river to fish so we packed up and headed downstream at about 1:30 or 2:00. We would side drift the runs the rest of the way to the take out. We would float down a riffle and Mike would eddy out the boat and anchor and we would fish the slots from the boat and then keep going and side drifting as we moved downstream. We hooked and landed more fish doing this.


The fish that I remember most on that day is the one that got away. Go figure! We had just drifted down a very shallow riffle that the boat had banged it's way through and were fishing a bouncy slot along some willows that was about 3 to 4 feet deep. I had shortened up my indicator and we were side drifting the slot, my indicator went down, I set the hook and the fish tore up stream, while the boat was still going down. Mike eddied out and the fish ran up through the shallow riffle that we had banged through and you could see the steelhead's whole back out of the water as it ran up. Big! Mike quickly rowed back upstream as far as he could. I thought that it was a goner but I kept pressure on it and hoping. It gave up and turned around and started back down stream. This fish probably went 14 pounds. Who knows? It tore downstream and Mike followed it. The fish then headed river right where there were two downed trees with root balls and limbs underwater. It was a tangled mess. Where did it go, straight for the sticks. I did all I could to keep it away but no luck. Mike rowed downstream and we could see the fish downstream of the snags. The only problem was that my line was snagged in a branch between the boat and the fish. Blake jumped out of the boat with the net and somehow got the line loose. As soon as this happened the fish moved into the middle of the river where the current was the slowest. I thought to myself, "we may actually land this bugger." The fish didn't stop. Directly across the river was a tree with a big root ball at the bank. This fish them swam straight to the root ball and stationed itself under the thick of it. Mike rowed the boat over and there it sat, directly in the middle of this mess with my tippet again tangled in the branches. It was six feet from the boat but there was no way could we net it. All I had out of the guides was the indicator and tippet. I stuck my rod tip under water and tried to work loose the tangled tippet. As soon as the fish felt the slack, the fish just bolted upstream. Gone! Game over! Mike made a comment something like "I've never seen a fish that pulled off a stunt like that." It's my clearest memory of that eventful day. Funny how that is.


Blake landed this beauty further downstream when we drifted through a riffle and just entered a nice slot. Kudos!


When we got closer to the take out we got to another deep slot that has a history of holding fish. There's a shear rock face that goes straight down into the river and creates a deep slot along the river right side. The run is probably 200 ft long. The water in this run moves slowly downstream and there is a foam line that you run your flies along. "Foam is Home." Sure enough my indicator had a slight down and I was hooked to a large steelhead. This was the perfect place to hook a large steelhead, but landing this fish was not easy. We worked and worked it and finally were able to secure it in the net. Whew!


That's a big fish in a big net!

This could be you. I've got to get back up there, its been too long.


Once again, Mike Hibbard, you are the man! I'll tell you now and I'll tell you again in the future. Call Mike for a day with an exceptional and hard working guide. Mike is a independent guide and takes pride in that fact. If you want to find out how to fish the Lower Sacramento River and the Trinity River give him a call.


Make a trip to the Trinity a "Tradition"


Wishing everyone and all of your loved ones a wonderful Thanksgiving.


Clay


You can contact Mike Hibbard on his cell phone at 530-526-5535
You can check out Ken Morissh's flys and the Anato-May at www.idylwilde.com


You can see this blog entry and past ones at http://www.flyfishingtraditions.com/


Sunday, November 23, 2014

Casting Tip - Let the Current do the Dirty Work

When wading on the Lower Yuba and nymphing with indicators and multiple shot, banging out false casts with a nymphing rigg can lead to more time spent untangling than fishing.

Instead of picking up and false casting let the current do the dirty work. This technique works for beginners as well as seasoned veterans and will enable both to make accurate casts, avoid tangles and catch fish.

Next time you’re out fishing try this;

  • Stand perpendicular to the current, facing downstream, and toss out your line out in front of you so it feeds out downstream until the desired length is achieved.
  • When you have the right amount of line our and the flies are skittering on the surface. With your rod tip pointed at the flies;
  • Lift the rod tip slowly up to the 2:00 position and stop. I mean really STOP! Then WAIT!
  • Turn and stand roughly parallel with the current, facing across and slightly upstream, look upstream and fix your eyes on the target area upstream you want to cast towards.
  • Bring the rod smoothing forward, SNAP IT to a STOP, and aim the cast through your thumb.
  • If done correctly the cast will unfurl and your fly or flies will land in the targeted zone..
You're now fishing. The key is the pause. Let the fly line stretch out downstream, let the flies skitter, Lift the tip and stop, set it up, and let it fly.

Let the current be your friend.

Wednesday, November 19, 2014

Kingfisher Drift Boat Build -Line-X for the Bottom


I'm at the point that I'm needing to decide on what type of material to use to protect and coat the bottom of the driftboat. I'm going to use Line-X. Linex is the product used by Jason Cajune of whom I purchased the plans for the Kingfisher. I've read a lot about how using Line-X is a great way to go but it is cost prohibitive. I had investigated Durabak which is a do-it-yourself bed liner and was feeling that that was the way I'd go. I could purchase the material for about $140.

I stopped by a Line-X dealer in my area to discuss using one of their products "Linex Standard" and was very impressed by the thickness and apparent durability of their product. I was quoted a price of $700 to $800. I agree with the idea that it is pretty pricey.

I decided that I'd load up my Hyde drift boat and take it to a couple of Line-X dealers in our area to have them see how big the boat will be and get additional quotes. There are 3 dealers in my area. I explained that my actual "Kingfisher" glue and stitch boat is about 6" wider and 10" longer than my Hyde. I also explained that I would do the prep and sand the bottom and the sides up about 4" with 80 grit. I would mask the line to be sprayed with Line-X. All they would have to do is apply their proprietary tape with an embedded wire to my masked line and then spray it. No prep, no muss, no fuss. I was quoted a price of $300. Now we're talking.

They explained that there would be no warranty as the product is not specified to be used in a marine environment. I'm OK with that, it has been a proven product by Jason Cajune and other boat builders in Montana.


The transom was sprayed up higher to protect the transom from the anchor 


The sides are sprayed about 4 inches up from the bottom. 

The Linex "Standard" material is sprayed on at a temperature of about 180 degrees. It does not come in a smooth texture so the material is sprayed in a "Smoother" texture but holding the gun further away and sort of fogging it on. The end result was sort of smooth with a slight amount of texture. How "Grippy" the bottom is only time will tell.

I now can drill through the bottom in three places for the brass drain plugs. Once that is done I can do the final prep on the inside and paint it with "Durabak" do-it-yourself bed-liner.

Another big step. It feels like I've finally climbed the mountain and and headed down the other side.

Fly Fishing Traditions - Tips - When in Doubt - Set the Hook

If you are like me, when I first started nymphing with indicators and shot, I would always be asking myself, "is that a hit or the bottom"? Unfortunately most of the time all I did was ask and not react.
Trout fishing legend, Jack Dennis, took an underwater camera into a local stream to discover what really happens when anglers made presentations to fish beneath the surface.
Among his more revealing discoveries: Anglers failed to detect 40 percent of the strikes they received using conventional nymphing techniques, particularly with indicators. That's right 40 percent!
What was his conclusion? The problem was too much slack in the line. Dennis found that fish feeding actively on a vast array of insects floating past their noses seldom moved much; rather, they simply held their position and opened and closed their mouths. In such situations, anglers generally failed to realize when a trout had taken the artificial fly.
In feeding situations with fewer insects, when trout drifted up or darted sideways to take the artificial, the line often moved sufficiently for the angler to detect the strike.
His solution was:
(1) To get as close as possible to the fish, eliminating as much loose line as possible.
(2) To heighten your concentration, and set the hook at the slightest pause in the drift. Make the hook set quick and short, keeping the fly down in the target area if you don’t connect.
If you want more tips like this you can pick up The Little Red Book of Fly Fishing – a new collection of 250 nuggets of fly fishing wisdom from Kirk Deeter and the late, great Charlie Meyers by clicking on the link.

Sunday, November 16, 2014

Kingfisher Drift Boat Build - Aft Knee Brace Construction

In a previous post I discussed the design process of building the aft knee brace for the Kingfisher. It is an involved process to say the least. In essence the aft knee brace is constructed with 3 pieces of 3mm Okoume plywood that are approximately 24" x 48" each. They are cut to size and then must be bent into a sort of "S" curve in a form constructed to the desired shape. The form ended up looking more like a big question mark. There is an inner and outer form that will be clamped together once the 3 pieces of Okoume plywood are steamed.


The first decision that had to be made is which direction to bend the plywood. In 3mm thick plywood it bends way easier one way than the other. The way I wanted the grain in the plywood to be oriented was unfortunately the hard way. Just my luck. Prior to steaming the plywood I could bend the dry plywood easily in one direction and hardly at all in the other. I'm steaming it right? I figured what the heck I might as well give it a try. So onward I went.

I had to construct a plywood box in which to steam the 3 pieces of plywood. I made a box that was about 30"wide x 54" long and 6" deep. It was like a plywood coffin. I devised a method to separate the 3 sheets as they laid in the box. I attached a radiator hose to one end of the box, fired up my propane hot plate with a 5 gallon bucket of water attached to the other end of the hose and steamed the pieces for 2 hours. I did some research on the internet where I found information stating that the marine adhesives would hold up to the steaming process.


Here's a photo of the steam box with the radiator hose coming into the bottom. There are 4" screws installed at the sides to sepatate the 3 sheets when they are placed in the box.


The box is closed up and the 3 sheets are inside and being steamed. I placed the box on a slight incline so the water vapors that condense can drain out of the low side. I placed an oven thermometer to see the temperature. The 3 pieces inside were steamed for 2 hours.


I took the 3 pieces out of the steam box and place them in the form and clamped the assembly together. This was not easy and it took four attempts to get in done.  The two opposing forms where hard to keep aligned. After much frustration They finally came together. You can see the "Question mark shape which are the 3 pieces of 3mm Okoume plywood clamped tightly together.

The three pieces of 3mm plywood were saturated and wet when they were clamped together. I left them clamped in the form for 10 days to enable them to dry back out before gluing them together.


Here's another view of the forms clamped together. Thank goodness for bar clamps!


After 10 days it was time to glue the 3 pieces of 3mm Okoume plywood together. I round sanded the surfaces that were to be glued with 80 grit paper. I lined the form with 3 mil plastic so the pieces would not end up glued to the form. I then flow coated each surface with clear epoxy.  This took about 3 ounces for each side that was coated (4 sides). I used one side of the form and used pieces of 1x2x24 oak across the sheets with a clamp on each end. I stared at one end and worked lengthwise along the sheets. This took lots of patience and clamps.


Here's another view of the clamps with the 1x2 pieces of oak stretched across.

I let the epoxy set up for 48 hours to make sure it set up properly. I removed all the clamps hoping that I would not have much spring back and that the plywood would stay in the same relative shape as it was in the form. Epoxy is strong stuff and it came out perfect.

The next step was too layout the final shape of the knee brace and cut it out. This was a very important step and one that I took my time doing in order to get it right the first shot. If it was done wrong I'd have to start over from the beginning. I mainly worked of photos of the knee braces designed by Jason Cajune and just winged it. 


Here's what it looks like. There are "horns" made out of 4/4 mahogany that will attach at the top which will form the actual "Knee Brace"  You can see a vertical piece made from 5/4 mahogany that reinforces the brace from flexing downwards and two braces on the back side to keep the brace from leaning forward. This unit will get epoxied to the bottom with biaxial tape and then additional 4" fiberglass tape and be installed in a permanent fixed position.


Here's another view showing the two braces on the other side.


Friday, November 14, 2014

Lower Sacramento River with Mike Hibbard Sept 2009

Fishing with Mike Hibbard on 09/13/09

Being that I decided to create the Fly Fishing Traditions blog this November, I have decided that I will periodically post stories about past trips to various destinations. Hope you will find them interesting.

I have booked a trip with Mike Hibbard of Redding, California for my birthday for I believe the last 5 or 6 years. This is what you do when you buy a drift boat and spent a lot of time rowing instead of fishing. You hook up once in a while with a guide who in my case becomes a buddy friend and get a fishing fix.

Mike Hibbard is a quality guide and person. He knows the Lower Sacramento and the Trinity River intimately. He is a independent guide and if you want to fish either of these rivers I would highly recommend that you contact him. His phone number is 530-247-3970 and his cell phone is 530-526-5535. You won't be sorry. In fact call me and I'll split the guide fee with you!


Mike had fished the river the day before and found that a small BWO nymph was working. The fly was a Mercer's Glass Bead mayfly in black. It was a size 20 or maybe a 22. There were lots of the small mayflies coming off the riffles. I know when I fish the river that I just don't go that small for the robust fish of the Lower Sacramento. But on this day it was the ticket.

Mike's typical rig is setup with a tapered 3x or 2x 9ft leader. He used to use a "Boles" indicator in blue or green but like many of us has changed to using a thing-a-ma-bobber. He sets the indicator about 18" to 24" below the end of the flyline. The shot is set at a rods length down from the indicator, usually about 9 feet. from there he goes with 3x fluorocarbon to the first fly, 4x fluorocarbon to the 2nd fly and then 5x fluorocarbon to the last fly. This is a rule of thumb for the Lower Sac.

On this day I was rigged with a size 14 King Prince, to a size 14 birds nest and then to the size 20 black glass bead baetis.

Zack was rigged up with a #14 cinnamon Fox Pupa, to a Sloans' Mighty May and then to a size 18 Hogan's S&M nymph.

Mike will typically start off with six different flies as he says on the Lower Sac each day the fish may want something a little different. By giving the fish multiple choices you can then focus on what they want to eat on any given day.

The fish seemed to want the smallest bug on this morning and we then had to figure out how to keep a hot Lower Sac rainbow on a small size 20 bug. Its not easy.


___________________________________________________
Zack and I hooked up with a double and we were able to net both of them at once.
___________________________________________________

___________________________________________________
This is the famous "Posse Ground" riffle.
___________________________________________________

___________________________________________________
Zack hooked this fish at the top of the riffle and fought all the way down to the soft water to land it. Probably 200 yards. That's a smile for you!
___________________________________________________


___________________________________________________
This is the willow in the concrete bunker at the end of the "Posse Ground Riffle" Always a good spot!
___________________________________________________


___________________________________________________
I guess this is my "karmic" reward for sharing the rivers with my friends and family from the view of my rowers seat.
___________________________________________________


___________________________________________________
This is the "Sundial Bridge". If you are in the Redding area fishing or just traveling through stop and take a stroll on the bridge. It's worth it.
___________________________________________________


__________________________________________________
Zack with another chunky Lower Sac rainbow.
__________________________________________________


If you live in Northern California you have to spend some time on the Lower Sacramento River. It is a world class fishery and is only 2 1/2 hours from Grass Valley and Nevada City. Give Mike Hibbard a call and he will hook you up.

Make a "Tradition"

Clay

Contact Mike Hibbard
* Cell 530-526-5535

Check out the fly selections at The Fly Shop

Thursday, November 13, 2014

Fishing Trip - Klamath River 11-09


11/01/09

My son Zack and I ventured to Northern California to fish the Klamath River below Iron Gate Dam on November 1st. My wife, Laura, had purchased me a gift certificate with Craig Neilson of Shasta Trout for Christmas last year. What a sweetie! I had planned on going up in the spring to catch the salmonfly hatch but unfortunately I was tied up with work. When being a building contractor you have to as they say, make hay when the sun shines.

Zack had a soccer game on Saturday so we headed up to the town of Mt. Shasta that afternoon and stayed at the Best Western Tree House Hotel, This is a nice place, although I will say go eat dinner in town if you choose to ever stay there. We got to the hotel at about 8:30 or so had dinner, goofed off a little and then hit the sack.


We met Craig Neilson in the morning at 8:00 and talked through the question of whether Zack needed a steelhead report card. We know that he doesn't need a fishing license as he's 11. The regs say anyone fishing the Klamath river is required to have one. So, we bought one to be safe. We then headed north towards the Oregon border on Highway 5 and took the Granada/Montegue exit. This drive on the back road to the Klamath was just spectacular. You sure don't feel like you're in California. We got to the river put the boat in and then did our shuttle. We were good to go.

There were quite a few boats on the river and we were the last boat down. Craig said he likes it that way and doesn't like "crowding". We had the river pretty much to ourselves all day and being the last boat down sure didn't seem to slow down the fishing. We also ran into my old buddy Jack Trout. He was putting his boat in right next to us and I walked over and stood next to the boat until he looked up and held my hand out to shake his hand. He looked shocked to see me. It was a classic Jack Trout moment. Anyone that has met Jack will know what I mean.

Craig rigged us up with his methodology for the Klanmath. We rigged with a "thing-a-ma-bobber" and dropped down about 7 feet to a single AAA shot. from there we went 18" down to a size 10 pegged egg, and then another 18" to a size 8 or 10 prince nymph. On Zack's rod he rigged the same from the indicator down to a rubberlegs that looks similar to a SALT stone (Check out the Fly Shops' Flies) with a reddish egg at the nose and then down 18" to the same pegged egg. That was pretty much the flies all day except the depth of the indicator was lowered and then raised depending on the depth and we added or took off shot as required.


The fish on the Klamath are some of the quickest hitting fish that I've encountered. you have to be right on the set and have good line management to keep a fish hooked. Zack struggled with this and got a little frustrated. But he kept it together. We managed to hook up steadily all day.

Craig stated that the larger winter fish are just arriving and that the fishing will typically get better for the larger winter run in late November and into December. It sort of depends on how the winter storms come in. We managed to land some nice steelhead although the 2 or 3 larger winter fish we hooked out foxed us.


There were quite a few salmon in the system and the resident trout and migrating steelhead were always in close proximity. There are some really good runs that you could probably have fished all day long in you wanted to, but you do have to get to the takeout.

If you ever care to fish the Klamath give Craig Neilson a call at Shasta Trout, 530-926-5763 or check out his website at www.shastatrout.com. He is a quality guide and person that has intimate knowledge of the waters in Northern California.

This could be you!


Make a Tradition!

Clay

Wednesday, November 12, 2014

Water Proof Camera


11/13/09

For anyone in the market for a waterproof camera that doesn't want to spend $300 to $350. A new camera has just been introduced to the market. I read an article in the Winter 2010 issue of Flyfishing & Tying Journal which described the Fujifilm WP.

The Fuji Finepix Z33 WP Waterproof Camera with 10 megapixels and 3x optical zoom is available at Amazon.com for about $140. I'm not sure if you'll get the color you want for that price, but what the heck. The retail price is listed at $179.95 and comes with a kit that includes the camera, battery and battery charger.

The camera is small enough to easily fit in a shirt pocket (3 3/4" x 2 1/2" x 7/8" thick). It is completely waterproof down to 3 meters and fully capable of taking pictures underwater.

The camera has an internal memory card of 50 megabytes but will also accept a SD data card. They say with a 2-gigabyte card with the camera set at its finest-quality setting, that you can store over 400 pictures.

The camera takes a Litium-ion battery and the battery has to be charged by the battery charger included in the kit. It is recommended to buy a second battery.

Sounds good to me. Beats My $300 Optio that has a cracked view screen that nobody will fix.

Can't wait to get that underwater shot releasing a nice fish.

Clay

Tying the Pettis Egg

11/11/09

I hit the Lower Yuba River with two newer friends, Frank Rinella and Tom Page. They are both guides in the area. The day seemed to be perfect with some overhead clouds and not the bright sun that we have been becoming used to in the past weeks. I could tell when we got to the put in that Keith Kaneko was already on the river and probably had been on it for awhile because it was about 8:15 and he was nowhere to be seen. He's been hitting the river pretty early which by the way is probably a good idea. As we were getting ready to go Dave Sloan from American River Flyfishing showed up with a couple of clients. This turned out to be it for the day. 2 guide boats and ourselves. There were of course wading anglers in many locations.

We did our shuttle to the Maryville Gun Club, which was nice for me as I am not a member of that club and have not fished down that far for years. I usually pull out at Sycamore Ranch which is upstream.

We started downriver with Tom rigged up with indicator and nymphing rig. Frank rigged up with no indicator as he likes to tight line his rigg as it works the water column. The nymphing was tough and even with changing a myriad of nymphs, eggs, streamers etc. We just could not find the fish or what they wanted all morning. Frank hooked up and landed a nice fish at about 11:00 or so. Shortly later Tom had a big down and was fast to a heavy fish. The fish was dogging and we started to think. Sucker? Sqwawfish? Sure enough. It was a big one though.

We fished the river hard and when we got closer to Hammond Grove Frank hooked a nice fish that went aeriel a couple of times. Frank played the fish steadily and we netted it. This was a fish that at first looked to go 20 to 21 inches but was quite a bit larger and was very thick. Tom quickly took a photo and we released the fish without really measuring it. Tom thought it went 5 or 6 pounds. All I know is that it was a slab.

All in all I think we had 5 or 6 fish in our hands, but there were a number of hookups with fish on but unable to keep on for very long.We had the best luck with eggs even though we've been hearing that it had become a mostly bug bite lately.

In the past month or so, I've been fishing mainly with a "Pettis Egg" that has a "Spirit River" burgandy colored plastic bead with "Cascade Egg Yarn" pulled over it in differnt shades. I'd been having good sucess with this pattern. All of a sudden it just doesn't seem to be working. Frank likes to use "Troutbeads" in different colors and keeps changing them up to find the color and size that works. He apparenttly is on to something. It also goes to show that if you put an egg in front of a trout or steelhead it will probably gobble it up.

All in all a great day with new friends. Can't beat that.

Clay

Pettis Egg Pattern

Products for this fly:
• Tiemco TMC 2457 Hooks
• Uni 6/0 Tying Thread
• Spirit River Plastic Egg Beads
• Cascade Egg Yarn


Step 1 Slide the bead onto the hook.


Step 2 Start your thread behind the eye of the hook and coat the hook shank


Step 3 Take a clump of Egg Yarn and push it over the eye of the hook so that the eye of the hook is directly in the center of the clump of yarn. Make some thread wraps to tie the clump of Egg Yarn in directly behind the eye of the hook. The clump should be thin enough so that when it is pulled back, the glow of the bead will still shine through a bit. It will take a few flies to get the proper amount of yarn right.


Step 4 Wrap over the butts of the Egg Yarn and slide the bead up to them. Then In one wrap move the thread to the other side of the bead and coat the shank of the hook with thread back to directly above the barb of the hook.


Step 5 Using your fingers, sweep the Egg Yarn back over the bead. It will be almost like turning the clump of Egg Yarn inside out. The yarn should be completely encompassing the bead.


Step 6 Once the Yarn is pulled tight back over the bead, move the yarn forward slightly with your left hand and it will balloon out. Make several wraps around it with your thread and you will get nice round egg.


Step 7 Clip the end of the yarn as tight to the thread wraps as possible and whip finish at the back of the fly. When tied properly you should be left with a very round egg and be able to see the glow of the glass bead through the egg yarn.

Fly Pattern from American Fly Fishing Co. americanflyfishing.com

Monday, November 10, 2014

Spey Clinic Part II - Heads and Tips


11/11/09

When we last left off I had mentioned that I'd get back to the "Rio Versileaders". The Versileaders are mini heads that extend from the main body of the "Scandi" or "Skagit" heads. They have a butt section of monofiliment that you can then extend with additional tippet to your fly or flies.

The Rio Spey Versileaders come in 6 ft (1.8 m), 10 ft (3 m) and 15 ft (4.5 m) leaders with a high tenacity nylon core. VersiLeaders feature an ultra smooth welded loop in the butt end making it easy to connect to the fly line.

Ryan Miller pointed out that Rio sells a wallet with either 10 foot or 15 foot Versileaders that cover sink rates from 1.5 ips Inches per second) to 7.0 ips. If you purchase that you are pretty much good to go with any of your integrated, scandi or skagit heads. Just pick which rate (ips) you want, add it to your integrated line or head and you're fishin'. He also pointed out that with a Sage Z-axis 11 ft. 6 weight switch used with my Altlantic Salmon and Steelhead line that I'd want to stay on the heaveier end of the spectrum, probably an 5.6 ips or a 7.0 ips. on the Lower Yuba which is my home river.

T-11 and T-14 Heads.


Ok, where are we going now. Remember in the last post we talked about adding sink tips to a Scandi or Skagit Head. Well a practical way to do this is to use lead core line. The differnt weights of lead core are designated by "T" which = grains per foot. So that means if you take a piece of T-11 lead core line and make a head that is 10 foot long. You have 10 feet times 11 grains per foot which equals a head that is 110 grains. Another good tip from Ryan is to purchase a Rio package of T-11 or T-14 lead core which is 30 foot long and cut in into 3 heads of 8 foot, 10 foot and twelve foot. You just add braided loop to loop connectors and you are ready to go.

I called Kiene's Fly Shop before I headed down to Sacramento and asked then to make me up 3 heads as described above. When I got there the 3 heads where sitting on the counter with the braided loops installed and just had to pay for them and head on out the door. Pretty cool. I never was very good at using those braided loop connectors.

Well that's it for now.

Keep the tip up.

Clay