Fly Fishing Traditions
Fly Fishing Traditions Blog and Website
"It's about Life & Fly Fishing"
Thursday, October 30, 2014
Drift Boat Rowing 101 - Part V - Rowing Situations
Situation #1
Entering the main current from an eddy or side channel
A situation that a rower must look out for, and then plan for, is when you have to enter a swift flowing current from a slower current, such as an eddy or other soft water.
When you encounter a situation similar to this, here are a few things you should take into consideration.
First, communicate with the anglers what you're planning on doing and what you want them to do, which is to sit down, hold on, and in some case put on their PFDs.
When putting into strong currents, try to drop downstream a bit, if possible, away from the eddy zones where there are great contrasts of current speed. Keep a sharper ferry angle of 15 to 30 degrees when first entering the current so the swifter water slides under your stern. If you pull out into a powerful current from an eddy with your boat sideways, at an angle of 45 degrees or more, water will tend to heave up and possibly over the upstream side. In extreme cases this can shove your upstream side of your boat under water, flipping it. You need to be especially careful in a low sided boat, like the low-profile drift boats that are so popular these days.
I'll tell you another rowing story. I just had purchased my Hyde low side drift boat and I was taking it out for the first time on the Lower Yuba River with my son Zack. Zack was 10 at the time. The put-in is just upstream of the Parks Bar Bridge. The put-in is a sheltered bay which is perfect for getting geared up and ready to go. The only problem is that it faces upstream and to get into the main flow of the river you have to enter the flow directly above the old bridge abutments which is a big pile of bouldered rip-rap. The river is channelized upstream of the abutments and wants to push you right into the rip-rap. The rip rap has a small to sometimes large standing wave. You have to enter the main flow and immediately ferry across the slot to get away from the rocks. If you don't, you're going to be into the rocks immediately. In the whole float below Parks Bar Bridge, the worst part of the whole float is in the first 40 feet. I pivoted and backrowed into the current at about a 30 degree angle and as soon as I hit the main flow the river pushed against my stern and some of the upstream side of the boat. This pushed the upstream side in down a little. This was no big deal but Zack for some reason moved to the upstream side of the boat at the same time and the boat keeled over more and shipped some water over the upstream side. I immediately pivoted the boat and got the stern pointed upstream and we were good to go. Nothing but a few shattered nerves by Zack. Zack is used to floating rivers in my large Fishcraft Raft, which is like a battleship, he can move around it and it has little to no effect on the raft. I made the mistake of not telling him to sit in the front seat, hold on and get ready. It was a good lesson for both of us. First I should have made sure Zack knew what to do and what to expect. And secondly, if a larger person would have done what Zack did we could have shipped a lot of water and in worst case flipped the boat. Lesson learned.
Situation #2 -Depth of Water When Ferrying
When rowing you need to be aware of the water depth and consider all contingencies, You need to consider things like (a) what is the best route downstream (b) What is the best position for the boat to be in for the anglers best success (c) What is the water depth.
When ferrying across the river the depth of the river can create problems with your downstream oar. Your downstream oar blade can be facing directly downstream. If the water is shallow it is possible to stick an oar in the streambed. You need to take shallow oar strokes with the downstream oar as you ferry across shallower water because when ferrying you are somewhat sideways to the current. The downstream oar could potentially jamb a blade in the streambed. If the oar jambs you could
(a) Break an oar blade
(b) Bust the oar out of the oar locks
(c) Bust the oar out of the oar locks and lose the oar
(d) Jamb the oar in the oar lock and flip the boat, because the jambed our can lift the downstream side of the boat upward.and shipping water on the upstream side.
It is not uncommon to lose an oar this way. Some people install oar straps to prevent losing an oar.
Situation #3 - Wrapping a Boulder
When a boat slams into a large river washed boulder mid stream, a predicable sequence of events can follow. The greater the speed and force of the water, the more likely the boat is to flip in the case of a drift boat or wrap in the case of a raft. The impact can be more jarring than you'd expect. Gear and people can fly overboard. Water instantly begins heaving up and possibly over the upstream side. This tends to shove the upstream side under water and in the case of a drift boat, flips it and sinks it, or in a raft pins in to the rock. In most cases like this the bottom of the hull or raft will be pinned to the rock. If you're in a drift boat and lucky, the boat will spin off the rock half full with water. As you may understand you don't want to be in this position.
How to avoid flipping on a rock. Once you find yourself approaching or engaged with a large mid stream boulder, the rower should continue rowing as hard as possible to attempt spinning the boat off the rock. If the passengers lean away from the rock in fear or attempting to brace themselves for the collision it only increases the likelihood of flipping the boat. The passengers should be consciously acting as human ballast in an effort to keep the boat from flipping. Whatever side is going down the passengers should move to the opposite side. This movement can keep a boat from flipping although it doesn't guarantee it. The boat may already be filling up with water and going down. If PFD's are not on they should be put on ASAP. By the way, good luck.
Labels:
Drift Boat 101
Tuesday, October 28, 2014
Drift Boat Rowing 101 - Part IV - Putting In and Shoving Off
Lets put some of our techniques into use and talk about the first maneuver you'll have to learn which is how to put in and shove off into the current.
Whether you're putting your boat in a river at a busy launch ramp, a primitive launch or in a portion of the river during your day, you need to know how to launch the boat properly. Most put-ins or launch sites won't present many problems, but there are instances where immediate control needs to be executed. An example of this is where the boat stops to scout a log jamb, a big rapid or large boulder garden prior to running it. This is by the way, always a good idea. There may be only one good route and rapids and obstacles show no mercy.
Sometimes pushing off can be tricky, You may find yourself with the current trying to push you into a rock garden, stump or log jamb, This is no time to panic. If you're floating down the river in a raft or drift boat, (although this first maneuver is much harder in a drift boat for the bow angler) with 2 fisherman and yourself rowing, the main focus of this method is to point the stern at a 30 to 45 degree angle to the current from the very start.
Here's the way to do it.
Getting Ready
(1) Start with the raft parallel parked on the shore. We are presuming there are two anglers and the rower.
(2) The front and rear angler will hold the boat in place and make sure it is floating and not hung up on the shore or submerged boulders.
(3) The rower will get in the rowers seat with hands on the oars and ready to back row.
Shoving Off
The next steps require good timing by as members of the boat or the boat could potentially spin immediately out of control.
(1) The stern angler pushes the rear of the boat off the shore to about a 30 to 45 degree angle across the current. This puts the boat at the correct ferrying angle so the rowers oar on the bank side can dig into the water.
(2) The stern angler quickly jumps into the rear position and sits down.
(3) Just after the stern angler pushes the boat to the ferrying angle and jumps in, the bow angler pushes the boat straight back and jumps in. The idea is to push straight back to maintain the 30 to 45 degree ferrying angle. If the bow angler waits too long to push off the stern will swing downstream. With a high sided drift boat with an uplifted bow, the bow angler must be agile enough to climb in the higher front sides.
Putting in When There Are Immediate Hazards
There are serious situations where not only does the boat need to get to the right place, but needs immediate inertia with speed built up by backrowing to miss a quickly upcoming obstacle or reach a necessary route. Establishing the correct (1) entry position (2) the correct set-up (3) the right ferrying angle (4) with enough momentum can be absolutely necessary. In these such serious situations such entries and maneuvers must be orchestrated with care and everyone needs to know their role and carry them out without error. As stated the putting in with the assistance of the two anglers is much easier when performing the angler assisted put-in with a raft. The anglers must be agile and quick to pull this off in critical situations when in a drift boat.
Option #2 - Putting In and Shoving Off by the Oarsman
In a drift boat it's may be better for the two anglers to get in the boat and to be seated. This is especially true with older and less agile anglers. It will be the rowers responsibility to handle the put in un-assisted.
Getting Ready
(1) The anchor should be raised up by the rear angler prior to moving to the rear seat. The oarsman will be holding the boat stationary.
(2) The two anglers should be in their positions and seated.
(3) The oars should either be in the water facing downstream towards the bow, or facing forward in the boat on the gunwales.
Shoving Off
(1) The rower pushes the boat off at the proper ferrying angle, about 30 degrees
(2) the rower immediately jumps into the boat.
(3) The rower takes his seat, grabs the oars and immediately starts ferrying the boat into the current.
The hardest part of this move is for the rower to jump in and maneuver around the oars and getting to the rowers seat. This is a move that should be practiced.
Putting In at a Crowded Launch or Primitive Put-In.
One suggestion for putting your boat in at a crowded launch ramp or put-in is to walk your boat downstream or in necessary upstream and get away from the crowd. This will allow you to get off in open water and not have to immediately maneuver around a crowd of boats. No one wants to have their boat rammed into at a put-in.
Labels:
Drift Boat 101
Friday, October 24, 2014
Drift Boat Rowing 101 - Part III - Manuevering by "Ferrying"
Basic Maneuvering - "Ferrying" the Boat
In Part II we learned how to pivot the boat by using one oar as an anchor or to use both oars to pivot the boat. Here's how pivoting comes into play when maneuvering the boat down a river and avoiding obstacles or just generally getting around.
All maneuvers of the boat involve ferrying or variations of ferrying the boat. To ferry the boat you point the stern (rear) of the boat right or left to an approximate 30 to 45 degree angle to the current and pull backwards on the oars.
The most important use of the ferrying maneuver is to avoid obstacles. When you ferry the boat you are maneuvering around an obstacle by pivoting and then pointing the bow of the boat at the obstacle and backrowing away from the obstacle.
Another time when ferrying is important is when moving from one side of a river to the other. To accomplish this maneuver you pivot and point the stern (rear) of the boat towards the side of the river you wish to move to at about a 30 to 45 degree angle, backrowing as you slowly move across stream. This will allow you to move to the other side of the river without losing much distance downstream as you cross.
Ferrying around Mid Stream Boulders
When you are floating down rivers you will often encounter mid stream boulders and will need to use the ferrying technique to move around them. This sometimes can be rapid fire and you may need to move left and them immediately right to avoid another one. Ferrying needs to become second nature.
Here is the basic ferrying technique.
(1) Pivot the rear of the boat until is is about at 30 to 45 degree angle to the current.
(2) Point the bow at the boulder or obstacle.
(3) Use backrowing strokes to move away from the boulder or obstacle.
(4) When clear of the boulder pivot the bow of the boat back pointing directly back downstream and make a straight path past the boulder.
(5) Use the same procedure but in the opposite direction, (1) pivot, (2) ferry, and (3) pivot back pointing straight downstream, if you want to move back in the eddy or slack water behind the boulder.
Work on using just enough movement to miss the obstacle by not more than necessary. Make sure you start your move with enough time to get out of harms way.
Here's a story about how not to do it.
Let me share a story with you. I've got a friend, lets just call him Ray for this tale. We were fishing the Madison River in Montana, which is known for it's riffles and bouldered runs. I was rowing my Fishcraft raft and Ray was rowing his Clackacraft drift boat which has the emblem on it, "Fear No Rock". I guess that's why Ray bought it. I was leading the way down the river and as we went down the river you could hear his boat, bang, bang, banging off the rocks. I thought what the heck is going on. Did they flip the boat? I pulled over and waited for him to catch up or pick up swimming anglers. He came down the river with everyone on board and then kept on going. I pulled back into the flow and followed him on down. Ray was rowing down the river and whenever he saw a boulder coming up he would start pushing forward on his oars and madly rowing to attempt to avoid them. As the river pushed him downstream and closer to the rock, he kept trying to get around it and bang, he'd hit the rock. He'd go another 1o0 yards and then all of a sudden, bang, he'd hit another on.
Moral of the story, you can't outrun a rock, you've got to use your ferrying technique to maneuver around it by using your pivot, and backrow to slow down the boat and move laterally to avoid hitting them.
Keep on back backstroking.
Labels:
Drift Boat 101
Thursday, October 23, 2014
Kingfisher Drift Boat Build - Finishing Booth
I've got a shop that is essentially a two car garage. It used to be larger, but I took an area of about 10 x 12 to expand the Fly Fishing Traditions World Headquarters. Once you put a drift boat inside the shop, it gets pretty cramped. Lately, I've been doing woodworking associated with the build and then flow coating epoxy on the various parts. One thing about doing wood finishing is that dust and finishing do not mix. When I'm flow coating epoxy I turn on a fan to clear the fumes and guess what. The dust starts floating around and the next thing you know you got a real fuzzy finish. This means more sanding and re-coating. It's basically taking two steps forward and one step back.
I've come up with a solution, I've built a finishing booth inside the shop.
I built a frame out of 1" pvc pipe. It is 10 feet wide, 19 feet long and 7 feet high. I used 10' lengths of 1" pvc pipe, pvc tees, pvc 90's and, 3 way corners. The rectangle you see in the photo above to the left is my access door. It folds up when I need access, when it is closed I duct tape it shut. The drift boat which is on a low table with casters can be moved inside the booth or outside when I need to finish other parts,
I purchased a 3 speed box fan and mounted it in the top corner facing the outside. The box fan came in a cardboard box. I just cut out the front and the back of the box and taped cardboard box with the fan inside to the pvc frame. On the opposite wall I installed two 1" x 20" x 20" HVAC filters to filter the air circulated through the booth.
I used 3.5 mil clear plastic sheathing for the walls and ceiling. All the seams are taped with duct tape. to make an airtight seal. The plastic on the walls are folded inside the booth about 12" +/-. I can also lay down a tarp down or another piece of plastic over these edges if I want a complete seal, or just tape the seams to the subfloor.
I've constructed two access doors. The larger door is to the outside and is sealed with duct tape when it is time for finishing. On the opposite wall I made a man-door that is about 2'6" wide x 6' tall. This was constructed by making a vertical cut in the plastic wall. I laid a strip of 2" duct tape vertically on the inside and outside and then cut it down the middle to the floor level. I did the same for the top of the man-door and made a cut horizontally about 30" long. It looks like a capital "T". This opening has another piece of plastic that drapes over it and when the fan is running it seals the opening. Well enough anyway.
The booth cost me about $200 to buy everything I needed. A worthy investment from my perspective. It will save time, turn out a better product and save me a lot of aggravation.
The booth is also light enough that when the weather permits I can actually drag the whole booth outside. The pvc parts are not glued, just taped together with duct tape, so when I'm done with it I can just disassemble it and store the parts away for next time. All that I'll be out when it comes time to re-set it up is probably having to buy some more plastic film.
Yesterday I flow coated all the 1/4" Okoume plywood decks parts, the oar locks and all the gunnel pieces. So far it's working perfect. I flow coated yesterday and guess what, no fuzzies. Success!
I've come up with a solution, I've built a finishing booth inside the shop.
Here's a photo shot from just inside the man-door into the finishing booth. I've set up 3 sets of saw horses and have all the latest parts to be flow coated with epoxy laid out. They were finish sanded and vacuumed prior to going inside the booth. My exterior gunnels are about 17 feet long and they fit in with about two feet to spare. When the drift boat is inside I've got about two feet of room in length and about 4 feet in width. I've got a 3 speed box fan mounted to the top right and my 3.5 mil plastic garage door is to the left. The plastic door is duct taped closed when it is time to seal the booth up and is large enough to move the drift boat inside and outside.
Constructing the Booth
Here's the plan I came up with.I built a frame out of 1" pvc pipe. It is 10 feet wide, 19 feet long and 7 feet high. I used 10' lengths of 1" pvc pipe, pvc tees, pvc 90's and, 3 way corners. The rectangle you see in the photo above to the left is my access door. It folds up when I need access, when it is closed I duct tape it shut. The drift boat which is on a low table with casters can be moved inside the booth or outside when I need to finish other parts,
I purchased a 3 speed box fan and mounted it in the top corner facing the outside. The box fan came in a cardboard box. I just cut out the front and the back of the box and taped cardboard box with the fan inside to the pvc frame. On the opposite wall I installed two 1" x 20" x 20" HVAC filters to filter the air circulated through the booth.
I used 3.5 mil clear plastic sheathing for the walls and ceiling. All the seams are taped with duct tape. to make an airtight seal. The plastic on the walls are folded inside the booth about 12" +/-. I can also lay down a tarp down or another piece of plastic over these edges if I want a complete seal, or just tape the seams to the subfloor.
I've constructed two access doors. The larger door is to the outside and is sealed with duct tape when it is time for finishing. On the opposite wall I made a man-door that is about 2'6" wide x 6' tall. This was constructed by making a vertical cut in the plastic wall. I laid a strip of 2" duct tape vertically on the inside and outside and then cut it down the middle to the floor level. I did the same for the top of the man-door and made a cut horizontally about 30" long. It looks like a capital "T". This opening has another piece of plastic that drapes over it and when the fan is running it seals the opening. Well enough anyway.
The booth cost me about $200 to buy everything I needed. A worthy investment from my perspective. It will save time, turn out a better product and save me a lot of aggravation.
The booth sits just inside the sliding garage doors. My work bench is mounted behind the spray booth with enough room to work at my radial arm saw and chop saw.
Summary
On final assessment, I really haven't lost much space at all because up to this point the boat has been in the same footprint. I can move the boat in and out of the space. I can roll the boat outside to do the sanding and roll it back inside to flow coat or eventually varnish. When it comes time to varnish this booth will pay big dividends.Yesterday I flow coated all the 1/4" Okoume plywood decks parts, the oar locks and all the gunnel pieces. So far it's working perfect. I flow coated yesterday and guess what, no fuzzies. Success!
Labels:
Drift Boat Construction
Wednesday, October 22, 2014
Drift Boat Rowing 101 - Part II - The Basic Technique
Rowing Technique
Let's get started with the basic rowing technique. As kids we probably at one time or another found ourselves on a lake in a row bow. To get around you'd be facing the bow (front) and you'd reach forward with your hands as the oar blades went back, dip the oars, and then pull them backwards, which resulted in moving the boat backwards. This is the same technique that will be the basis of rowing either a drift boat, a raft with a rowing frame or a pontoon boat.
You will be pulling on the oars and not pushing forward on the oars. In essence when rowing you will never row with a forward motion with the oars. The only time where pushing forward on the oars (forward rowing) is useful, will be in a situation where you are in slack water or in a run and you want to accelerate the speed to move downstream to get downstream faster. That's it. You should never row forward to maneuver the boat or to position the boat or to avoid obstacles.
Hand Positioning and Technique
When getting started with rowing a drift boat, having a pair of rowing gloves can come in handy. You will probably be rowing for a good part of the day. It's not fun to be rowing the next day with blisters.
When you sit down in the rowers seat and grab the oars, your hands will be over the oars in a natural position and you will be looking at the backs of your hands.
You will want to rotate the oars so that the blades of the oars are roughly perpendicular to the waters surface. My Hyde oars have nifty little knobs on the ends to help you feel when they are in the right position.
The Basic Stroke
The basic backward rowing stroke consists of the following actions
(1) Lift the oars out of the water
(2) Raise the oars a few inches out of the water or higher to clear obstacles or turbulent water.
(3) After lifting the oars out of the water move your hand forward while the oar blades move upstream (towards the stern) to set up the back rowing pull. Dip the oars in quietly. Don't splash down the oars.
(4) Dip the oars barely under the water and immediately pull backwards and lean into the oars. Bend at your waist.
You want to achieve a shallow, smooth quiet stroke. The tempo should be easy and continuous. Your goal is to slow down the downward progression of the boat. You want to be constantly looking up and ahead for river hazards and obstacles while keeping the boat positioned correctly for the anglers. It is easier to take 3 shorter compact strokes than 2 longer stokes.
Back Rowing
The 1st rule of rowing is that all maneuvering shall be done with back strokes pulling on the oars and not pushing. When an obstacle is encountered and you row forward you only increase the speed and rate of approaching the obstacle. Back rowing must become a firm and good habit.
There are many times when the boat is positioned mid stream and the anglers will be casting towards the slower water along the bank. As the rower, your job is to slow down the progression of the boat downstream to enable the boat to keep pace with the slower water along shore. This requires a constant rhythm of back rowing. The rowing pace is about one stroke every three seconds. A good steady pace needs to become second nature.
Anticipation
When rowing a drift boat, a raft with a rowing frame or a pontoon boat it's all in the planning. You must learn to anticipate your next move like;
- Where should the boat be positioned to optimize the fishing conditions?
- Are there boulders, rocks, snags, hazards or obstacles coming up?
- How should I avoid them?
- How much effort and speed will be required to avoid the hazard, obstacle or boulder?
- When do I need to start my maneuver.
- When encountering an island or side channel, which way should I go and where should I position the boat prior to heading that way?
- Should I alert the people in the boat to put on their PDFs.
Pivoting
As we have discussed so far in Part II, all maneuvering of a drift boat, raft with a rowing frame or pontoon boat should be done with back strokes. The next habit to develop is that of pointing the stern (rear) of the boat in the direction that you want to go. This is done through oar manipulation. It is called "pivoting". After the boat is pivoted, with the stern pointed in the direction that you want to go, pull back with both of the oars at the same time and move the boat at 45 degree angle to the current. Lets look at how you actually do the pivoting.
There are two ways to pivot a boat. The first way is performed by moving one oar while the other is stationary in the water as a brake. The brake side is the side that you want to pivot towards. You then take several backstrokes with other oar. This will swing the stern around in the direction that you want it to be pointed, which is the direction you want to go. It will just take a few strokes to change direction. You will want to start pivoting using this method and getting comfortable with it.
Once you've got the pivoting with one oar as a brake mastered, you will want to work on the second method which is done by pulling back with one oar and pushing forward with the other. This method speeds up the pivoting process. It becomes important when you have to make quick moves working your way through a bouldered run and maneuvering around them. These areas require quick decisions and instant action.
Pivoting moves need to become second nature and as a rower your job is to move the boat deliberately and smoothly. Making a quick pivot can result in an angler loosing balance even when standing in a knee brace. Anglers positioned in the rear of the boat have been know to be throw out of the boat by a quick pivot. It is the rowers job to make smooth pivots which enable the anglers to continue fishing without hardly realizing you have just pivoted the boat. If a hard pivot must be accomplished to avoid an obstacle in is the rowers job to tell the anglers to get ready for the move and to hold on or even sit down. Communication is key!
The best thing to do when first getting into a rowing seat is to find a calm stretch of water and practice the pivoting and ferrying moves. Visualize a boulder in the middle of the river and making a pivot to the left, back row away from it, pivot back straight, pivot back right, back row back behind the imaginary boulder and pivot back straight. Do this over and over again using the pivot with the brake and then with the pivot using both oars.
Practice makes perfect.
Labels:
Drift Boat 101
Sunday, October 19, 2014
Drift Boat Rowing 101 - Part One - Getting Started with Gear
As you may have heard we had a death on the Lower Yuba last month when an older gentleman was knocked out of a drift boat rowed by his son and did not recover. I discussed this with friends and have decided to post some articles about the art and safety regarding rowing a drift boat, raft or pontoon boat down a river. So with that premise here's;
Drift Boat 101 - Part One - Getting Started - Gear
With more and more people floating our rivers in drift boats, rafts and pontoon boats it is important to emphasize the education and practice to row boats safely.
Safety and Gear
When getting together the gear to outfit a drift boat there is more to it than rods, reels and flies. Lets go over a list of safety gear.
Life Vests - There should be life vests ready and available for all people in the boat. I'll put the life vests on the seats so they are accessible. When scouting a run and a difficult or technical run is anticipated. Put them on! They will be of not much use if they're stowed away or not on. Here's a PFD available from NRS, their Chinook Fishing PFD
http://www.nrsweb.com/shop/product.asp?pfid=2150&pdeptid=2059
Throw Bag - You should have a throw bag which are available at NRS which can be used if you ever have someone overboard and then can throw a line to haul them to safety. Essential on big water Class III and above. Not really necessary on class II or lower. Here's a NRS Throw bag.
www.nrsweb.com/shop/product.asp?pfid=1825&pdeptid=961
First Aid Kit - As with any outdoor activity having a well stocked first aid kit is a very good idea. Here's a link to a HRS first aid kit in a waterproof bag.
http://www.nrsweb.com/shop/product.asp?pfid=27431&pdeptid=1076
Sunscreen - I try to always have sunscreen available for myself for whoever else might need it. Simms make a good one. But just about any good brand will work.
Rowers Gloves - A good pair of rowers gloves comes in handy if you're not on the river rowing everyday and can prevent blisters and sores on your hands. Here's a link to NRS Paddlers Gloves
http://www.nrsweb.com/shop/product.asp?pfid=2440
Sunglasses - Everyone in the boat should have sunglasses. This is a safety issue as much as a tool to help spot fish. A hook in the eye is no one's idea of a fun day. I like the Action Optics Guides Choice.
http://www.smithoptics.com
Break Down Oar - Carlisle Oars sells a breakdown oar that can be strapped under a rowers seat in a drift boat or along the tube on a full sized raft or cat. You don't want to be halfway down a river and lose an oar. Get One! You can purchase on at Hyde if need one.
http://store.hydeoutdoors.com/boat/carlisle-spare-2-piece-oar
Coming Soon - Part II - Basic Rowing Technique
The next article, Driftboat 101 - Basic Rowing Technique, will get started with the basic rowing technique and then on to making "Ferrying Maneuvers".
Labels:
Drift Boat 101
Thursday, October 16, 2014
Techniques - Nymphing and Current Speed
Current Speed
When rigging up and selecting flies for nymphing a river you need to consider the type of bug you are targeting and the current speed of the water. Current speed is one of the most important things to keep in mind when selecting and fishing a nymph patternMost nymphs generally live under rocks near oxygenated water – water with a steady current. When water conditions are high with faster flows, nymphs get pulled from the rocks in which they live. When the nymphs are ready to hatch they swim to the surface or crawl out onto land. In either cases, the “heavy flows and water”, means faster current, which will sweep the nymphs downstream.
Think of the nymphs being drug down stream as silt. The heavier the silt, the faster it settles in the water. As the current speed slows, the nymphs will either swim to the surface and hatch out or fall back to the bottom and crawl under a rock and find a new home..
With this in mind, it makes sense that the bigger nymphs will hatch in heavier water and the smaller nymphs will hatch in slower water.
On the Lower Yuba River there are many different nymphs, primarily, caddis, stoneflies and mayflies.
Stonefly Nymphs
The stonefly nymphs will crawl from the river bottom, out of the water, and hatch out on the rocks, so when fishing a stonefly nymph you should concentrate your fishing close to bottom and the water’s edge where the nymphs are more likely to be. This will require more weight, more than you think, hint. Stonefly nymphs come in a variety of sizes, some of them rather large, so think of them as silt – bigger nymphs in heavier water.Mayfly Nymphs
The mayfly nymph swims to the surface to emerge. These nymphs range from tiny to small and are more vulnerable to heavy current. The slower the river current, the easier the nymph can swim to the surface to emerge. The faster the current and the deeper the water, the farther downstream the nymphs will emerge on the surface from their lie on the bottom. With this in mind, fish the heavy water with your nymph close to the bottom. if you are seeing the beginnings of a hatch you may find that as the current slows, fish the nymph higher up in the water column, lower your indicator or maybe change to a dry dropper or a emerger, dropper combination.
Caddis Nymphs
The caddis nymphs tend to live in the riffles and the tactics are somewhat a combination of the above two methods. As the caddis tumble downstream they will fall towards the bottom so fish your imitations in the flow at the current seams and deep. If there is no indication of a caddis hatch keep your presentations deep. If you see a caddis hatch progressing you can then change up your rigg to fish the upper levels of the water column with a dry dropper, emerger with dropper or rigg up to swing soft hackles.
Remember, current speed and the type of bug you're targeting can dictate your tactics and rigging methods. Don't get caught rigging up one way and not changing up as conditions dictate. A rigg chance can turn the fishing back on.
Labels:
Techniques & Tips
Tuesday, October 14, 2014
Kingfisher Drift Boat Build - Aft Knee Braces - Design Process
First I'l catch up a little with an update - I've got my dry boxes installed on both sides. This entailed using 5 minute epoxy to attach the front and two sides of each dry box to the bottom and sides. The 5 minute epoxy was used in spots just to hold the pieces in place. Once they set, I mixed up some epoxy peanut butter, pretty darn thick and used it to fillet the pieces in place. The fillets form a cove that is a transition from horizontal to roughly vertical (floor to sides). Once the fillets are installed 4" glass tape is applied over them and then flow coated. A lot of busy work. It took a full day to get it done, and I mean a long day. That doesn't include the sanding once it's set up.
My next task of choice, not necessarily in the right order was to make a decision how to construct the aft knee brace. I like the idea of the flow through interior. I want to be able to get from the bow to the transom without crawling over a knee brace. I've decided to do a knee brace similar to the one that Jason Cajune does in his "Recurve" boat. The problem is, it ain't easy by any means. The one I'm constructing will look something like the photo above. I first thought they were a little too "George Jetson" for my taste. But as I've explored my options I've decided the Jetson's were cool.. There aren't any plans or instructions how to do this so I'll have to just dead reckon my way through it. I'm pretty good at that.
The reason I'm working on them now is that they attach somehow to the aft level floor step and are partially painted with the same material as the floor. So I've got to be able to;
The photo above is the aft pedestal in one of Jason Cajune's boats.
My next task of choice, not necessarily in the right order was to make a decision how to construct the aft knee brace. I like the idea of the flow through interior. I want to be able to get from the bow to the transom without crawling over a knee brace. I've decided to do a knee brace similar to the one that Jason Cajune does in his "Recurve" boat. The problem is, it ain't easy by any means. The one I'm constructing will look something like the photo above. I first thought they were a little too "George Jetson" for my taste. But as I've explored my options I've decided the Jetson's were cool.. There aren't any plans or instructions how to do this so I'll have to just dead reckon my way through it. I'm pretty good at that.
(a) Figure out how to construct the darn thing.
(b) Figure out how to attach it
(c) Decide if it's permanent or removable
(d) Get it done or figured out before I paint the floors and the lower part of the sides and dry boxes.
Solving the Construction of the Aft Knee Brace
The knee brace is constructed by laminating 3 layers of 3mm Okoume plywood in what amounts to sort of a "Question Mark" shape. Pretty appropriate when you have no idea what you're doing. It will end up about 7/16" thick and glued together with thickened epoxy. I started out by cutting some different shapes out of scrap plywood to see what shape seemed "right".
Here's a photo of one of the "Question Mark"s I cut out to see what it might look like. This one was too deep of a bend I thought. I cut different shapes until I got one that seemed right. For me it's just sort of a trial thing. Try different curves until I thought "That's it". I'm shooting for a height of 27" above the aft level floor.
Once I determined the shape, I needed to construct a form to bend the plywood to the desired shape. I laid out the "Question Mark" on a 1/2" sheet of plywood and made to opposing pieces that will mate together with a 7/16" gap between them (the thickness of the laminated plywood). In the photo above you can see the 7/16" strip that is being cut out. I had to make two each in order to make a form that was approximately 24" wide.
Here's the forms assembled. I will be bending 3 pieces of plywood that are 24" wide by 48" long. All I have to do now is figure out how to get the 1/8" Okoume plywood to bend to the shape. Another "Question".
Next Up Steaming and Bending 1/8" Okoume Plywood
A forewarning, It ain't Easy!
Labels:
Drift Boat Construction
Saturday, October 11, 2014
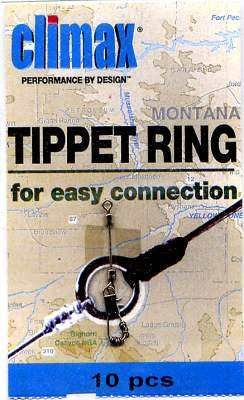
Techniques - Tippet Rings for Leaders
I've recently started looking into fishing the Truckee River this fall. It's only a one hour drive from home and an option that I really haven't taken advantage of. Why? I've been concentrating on the Lower Yuba and the Lower Sacramento River. It's sort of funny, I've been working in Truckee for the last 8 years and when I've gotten done working, I want to get the blank out of there. I'm done working there, so now I want to start fishing there. Go Figure. I guess I am nuts. Pass me a shot of scotch, please.
One of the things I've come across, getting ready, is the technique of rigging using braided line and "Tippet Rings". From what I hear, when fishing the Truckee River, the larger browns like to hold in deeper slots amongst boulders and larger rocks. They also like to hold right on the bottom. This results in lots of lost flies and re-tying leaders and sometimes totally re-rigging.
As a remedy to constantly hanging up and changing riggs and losing flies, the local guides have come up with a rigging system to avoid these break-offs by using a modified "Czech Nymphing Rigg".
Here is the basic formula for a Czech Nymphing Rigg
This modified Czech Leader is comprised of 3 basic components.
(1) A short length of 25 lb. or 30 lb. braided leader material. 60" to 72" when tight line nymphing without indicator, or, 72" to 84" if you are planning on using an indicator.
(2) A tippet ring tied to the business end of the braided line.
(3) Monofilament or fluorocarbon tippet down to one or two blood knots with one long tag end to tie on dropper flies.
Note: This formula is used with a very heavily weight middle fly and no split shot.
An optional rigg is to add a short 12" piece of 2x mono and an additional tippet ring to place shot above the second tippet ring. The top two flies would then be tied off blood knots with an extended tag.
Adding Your Droppers
You can add droppers by using a blood knot and leaving one tagg long to tie on the fly or you can use additional Tippet Rings. The advantage of using the tippet rings is that you can use much heavier tippet between the rings to prevent losing your rigg.
Once you extend the tippet from the braided line you will add one or two droppers depending on whether you are fishing two or three flies.
As shown at the photo on the left, you can attach tippet material using fluorocarbon tippet using clinch knots.
So why would you use tippet rings.
(1) So you can transition from larger tippet to smaller tippet.
(2) If your fly gets hung up on the bottom, in the rocks or gets snapped off by a monster brown trout, you may only loose one fly and not your whole rig.
Using this Rigg for Bounce Nymphing
Note: Please verify if this method is legal in the waters you fish.
Is the Bounce Rigg method considered illegal in California? This is still being debated in certain circles. For years many Truckee anglers used this rig and added split shot at the very bottom of the rigg. This enables the angler to bounce the shot and flies right along the bottom as they high stick and lead the flies through the slots.
When rigging for the bounce method, the shot goes on the very end, tie a double overhead knot and place the shot directly above the knot.
The first fly above the shot is tied on a blood knot tagg about 6 to 8 inches above the shot. The second fly is tied on a blood knot tagg about 6 to 8 inches above the first. This rigg typically is tied with two flies.
Czech Leader System available online or at Local Flyshops
The legend of Truckee, Andy Burk, has marketed his Czech Nymphing system through Umpqua, although most of the local Truckee guides tie up their own. This is a complete ready to go system. It is a re-usable three fly leader with one tippet ring and ready to tie on tags for two droppers.
Hope this all makes sense, want to pour me another shot?
Clay
Labels:
Gear,
Techniques & Tips
Wednesday, October 8, 2014
Fishing Trip - Truckee River 10-07-10
It's feeling like fall and the trout should be feeling the change. With shorter days, and cooler nights I was hoping the rainbows and browns of the Truckee River would be ready to play. As I drove up to meet Blake Larsen the weather was cool and I -80 was wet from a steady drizzle. This is the first day of the fall that I didn't automatically put on shorts and a t-shirt. I brought along a change of clothes, rain gear and a fleece sweater thinking I may need it. Perfect fall weather.
As I drove up I was thinking about rigging up with a system that is similar to the Burks Czech Nymphing System. I've also heard this called a Pit River Rigg. Essentially you tie about 5 feet of 25 or 30 pound braided line to your fly line and then tie on a metal tippet ring with a clinch knot. The reason for the braided line is that there are so many boulders and rocks to catch your flies and shot that if you use a standard leader you may be re-tying new leaders and flies all the time. Makes sense to me. Why not try it, I thought.
Blake had suggested to run and gun the river from about the outlet at Boca down to below Hershdale and hit some good looking runs. I was looking forward to trying the river as I'd heard reports that it had been fishing pretty good. We were looking for areas that had mid stream boulders with deep slots between or below. The idea was to find areas like this and deliver short upstream casts and high stick the rigg through, leading the flies downstream and attempting to keep in contact with the bottom. Easier said than done. I found that it's a game of constantly managing the amount of weight you're using and that changes with the depth of the slot and the velocity of the water.
There were quite a few BWOs coming off at about noon with a lot of smaller fish taking them in the film or on top. Of course I was set up to fish on the bottom. I got the hang of the high stick nymphing it and was able to pick up a couple of small fish and started getting my confidence up. We fished a nice bouldery run and there was a nice slot, with it seemed to me, just the right current speed. It was behind a large mid stream boulder and had a soft trench that was about 25 feet long. The trouble was it was across a heavy current seam. This required a good roll cast with an immediate stack mend followed by large upstream mend to get a drift. I tried to get a good drift and finally got the rigg in the seam I wanted and was soon off to the races around the bend downstream chasing the fish as it ran. I got one good glimpse of it and it was a good sized fish. Blake was fishing further downstream and was able to net a nice Truckee River rainbow with big shoulders. I guess my patience paid off.
We headed further downstream and when I fished a dropoff to a run I picked up a 18" to 20" small mouth bass. That was totally unexpected. When I told Blake about it he said that he'd heard of small mouths being lower down the river. Like I said it, was a surprise.
I had a great time exploring the Truckee River and it was a fun alternative to being behind the oars on the Lower Yuba in my driftboat. I think the fall season is just starting up and there should be some real good days coming up. Another thing to look forward to.
Labels:
Fishing Trips
Monday, October 6, 2014
Kingfisher Driftboat Build - Dry Box Frame
Well, I've been doing my favorite thing. Epoxying and sanding. Sound familiar. I've got all the parts cut out and fit for the dry boxes and the four deck parts. I'll recap the process here.
It basically goes like this.
- Cut and fit the rod beams
- Cut and fit the deck support beams
- Temporarily attach the deck beams and the deck support beams in place with screws.
- Rough Cut, Scribe and final fit the deck parts
- Fit the sides of the dry box to the sides
- Fit the face of the dry box to the bottom and the bottom of the rod beam
- Take it all apart and coat all sides with clear epoxy
Sounds easy, right, all except the last, Epoxy, sand, more epoxy, more sanding.
Deck Support Beams
- The rod beam is temporarily held in place with 4 - 1" screws that are driven from the outside of the hull into the ends of the rod beam
- I clamped an 8 foot long straight edge to the beam to keep it straight as I fit the support beams.
- You can also attach a string line to assure the rod beam stays straight.
- There are three main deck support beams and one at the junction of the side deck to the front deck
- The deck support beams are temporarily installed with screws.
This is the middle support beam. It is the same width and height as the rod beam.
13/16" x 2 1/2".
Here are three of the deck beams installed. The one at the front supports where the side deck meets the front deck. This support is laid flat. I eventually added another support to reinforce the rear of the deck.
Side Deck Parts
- The two side decks and the front decks are made from 1/4" Okoume plywood.
- They are rough cut to size and then scribed to fit the sides.
- The interior straight edge of the side decks line up with the edge of the rod support shelf
Here is one of the side decks that has been scribed to the sides. The two openings for the dry boxes have been cut out. The top inside edge of the side deck aligns with the rod shelf. This is some tricky scribing. Take your time and get it right.
Front Deck Parts
- The front deck is made from two pieces and glued together along the centerline of the boat.
- It is made from two pieces so the grain of the front deck flows toward the rear of the boat.
- The front deck has a half circle that is the same diameter as the distance between the two side decks once they are scribed in. (See photo below)
- The front deck is raised about 2" high than the side decks at the stem (bow). This allows water to drain towards the rear of the boat.
- It is important to make sure that the distance from the front of the pedestal to the apex of the circle is at least 16". Preferably 18". I had to make this about sixteen inches as my pedestal is larger than typical because it houses a cooler.
The front deck is temporarily clamped in place after it has been scribed in. The bow is two pieces.
Dry Box
The dry boxes sit underneath the rod beams and are approximately 5 foot long centered on the rod beam length. (Approximate center of the boat)
- There are 4 pieces of 1/2" Okoume Plywood that are scribed into the sides that form the ends of the dry boxes (2 on each side)
- The face of the dry box is made from 1/4" Okoume Plywood. The bottom of this piece is scribed to the bottom and fit under the rod beam.
- This dry box face is set 1/4" back from the lip of the rod holder 1/4" plywood to allow a dadoed trim piece to be installed later.
Here the 1/2" Okoume Plywood is in the process of being scribed to the sides.
You can see the face of the dry box fit under the rod beam on te left. The face is held back 1/4".
Sealing the Parts
Now that everything is cut and fit, everything has to be disassembled and sealed with epoxy. The rod beam and deck support beams get flow coated with clear epoxy and finish sanded. The 1/4" Okoume plywood also gets flow coated and sanded. All of these parts are flow coated only and are not glassed. Oh boy!
Labels:
Drift Boat Construction
Fly Fishing Traditions- Tips - Tie with Smaller Hooks
I've recently subscribed to an Internet newsletter from Deneki Outdoors, at www.deneki.com It is an informative website with lots of good information. I recently came across an article which talked about hook sizes when fishing for anadromous species such as the steelhead we chase on the Lower Yuba River.
For years the "standard" hook sizes used in the pursuit of anadromous fish on swung flies were pretty darned big, 1/0 and 1 are "steelhead hooks". A lot of streamer patterns available online or in our local fly shops are tied on these large hooks.
In the Pacific Northwest many anglers are starting to use smaller fishing hooks that are quite a bit smaller – 1 and 2 for King Salmon and 2 and 4 for Steelhead. It is reported from these fishermen that a funny thing happened on the way to the smaller hook – they started landing more fish!
The common perception is that a big hook is going to hook deeper and hold more securely. It turns out that, that perception is not often the case. There are some other reasons to fish smaller hooks too.
Why Smaller Hooks Might Be Better
- You land more fish. The anglers of the Pacific Northwest have discovered that landing rates are higher with smaller hooks. Most modern hooks are extremely strong even in smaller sizes. Smaller hooks tend to bury deeper, particularly in the corner of the jaw. Once a fish has been hooked solidly, smaller hooks with shorter shanks have less leverage to work open a big hole and eventually pop out
- They look better. Smaller hooks are more proportionate to the flies that we normally fish, especially for steelhead. Do the fish care? We’re not sure, but if you want fish a fly that looks good, shouldn't those good looks include the hook?
- They’re easier on the target species. Smaller hooks are less likely to hook eyeballs, backs of tongues, gills, etc. That's important.
- They’re much easier on the non-target species. If you’re fishing for steelhead, chances are you’re going to incidentally hook some trout along the away. The point above is even more true for smaller resident fish – a giant hook can do an awful lot of damage to a beautiful rainbow trout.
Labels:
Techniques & Tips
Wednesday, October 1, 2014
Kingfisher Drift Boat Build - Rod Beams
Well it time to get back into some woodworking. I need a break from all the epoxying and sanding so the timing couldn't be better. I've glassed in the fore and aft pedestals and also the fore and aft level floors. The 3/4" conduit is installed for the anchor rope,
It's time to start on the "Rod Beams", the rod storage shelf, the dry boxes and the Decks. The rod beams, joists and dry boxes provide a lot of structure to the boat. It will stiffen up the boat once everything is epoxied into place. This will all be covered in the next number of posts.
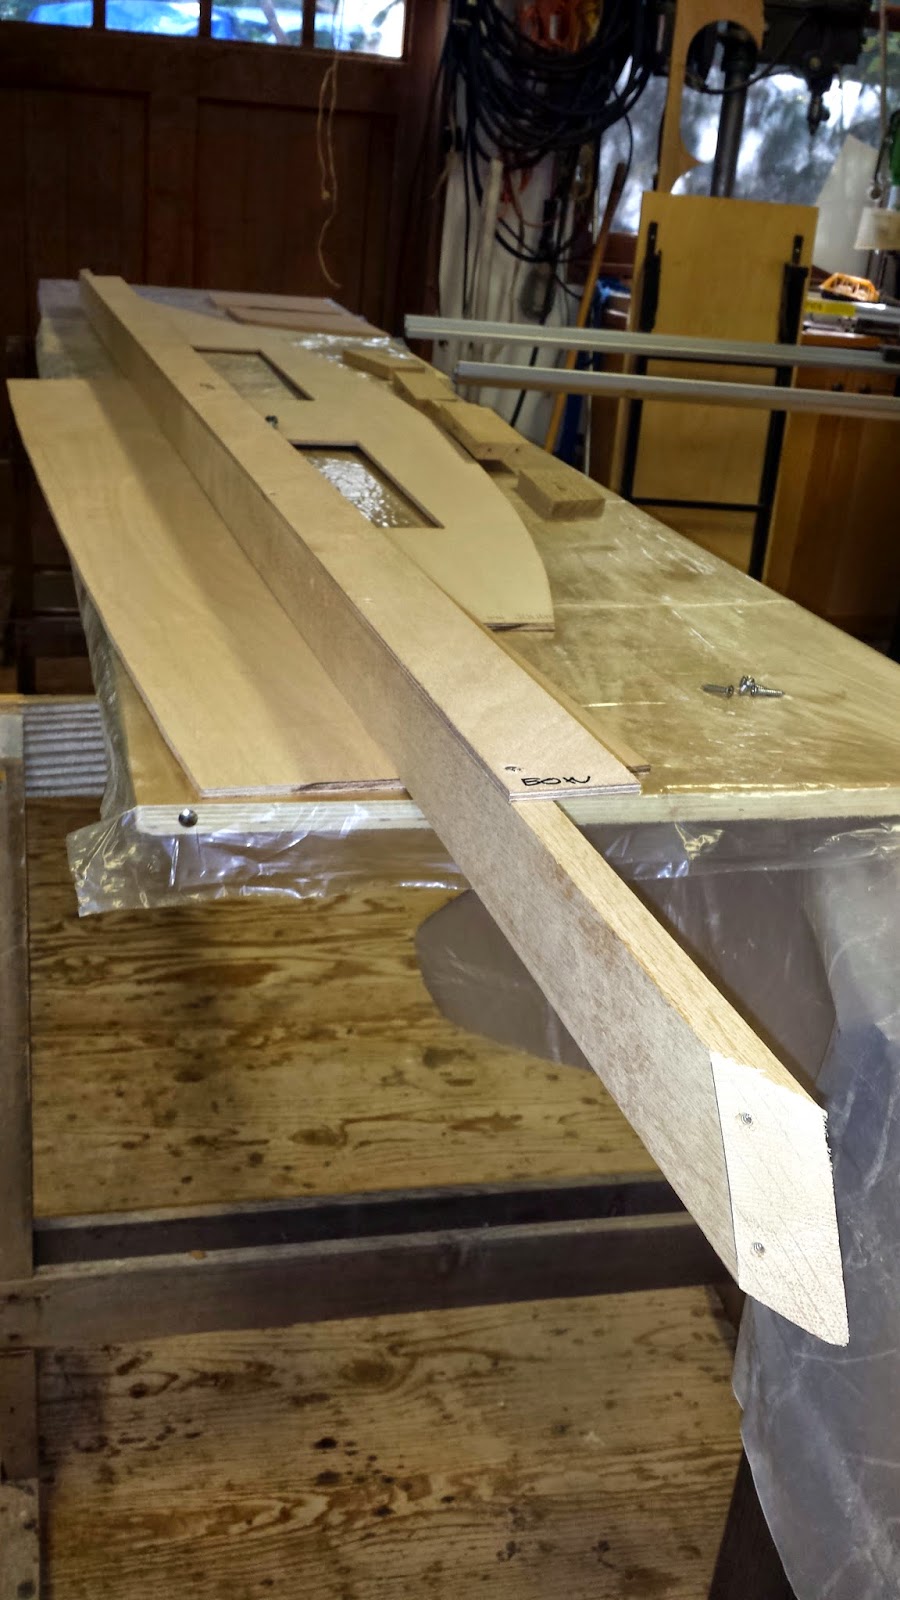
There are two lower level temporary spreaders that are about 10 1/2" on the floor. They give the boat structure will the dry storage boxes and the decks are installed. The rod beams set on top of these to establish the height off the floor. The rod beams are made from 4/4 stock milled to 13/16" x 2 1/2".
There are two rod beams that are 10' long, one each side of the boat, and the rift sawn white oak I have is 8'6". The first thing I have to do is to scarf two 6' long pieces together to make a 11' long piece. My board stretcher is busted.
I had to layout and cut scarf joints on each piece that are 8" long. I rough cut these on a jig I made for the table saw. and then made another jig to run a top bearing straight bit to fine tune the cut. (Difficult to explain without photos, sorry)
Once the cuts were made I sanded the scarfs with 80 grit to rough up the surface. I then mixed up some epoxy peanut butter and spread it on both scarf joints with an 1/8" notched trowel. I matched up the scarfs and clamped the joint together, careful not to starve the joint and squeeze out too much of the epoxy peanut butter.
The next day I took the clamps off and sanded the rod beams. I now have two 10'4" long pieces. I cut these to 10'1" long.
The next step is to cut 2 pieces of 1/4" Okoume plywood that are 2 1/2" wide by 8' long. These will be attached to the bottom of the rod beam forming a sort of "L". with the 1/4" piece oriented towards the interior of the boat. This 1/4" piece will become the rod holder. There will be rod storage on both sides.
It's time to start on the "Rod Beams", the rod storage shelf, the dry boxes and the Decks. The rod beams, joists and dry boxes provide a lot of structure to the boat. It will stiffen up the boat once everything is epoxied into place. This will all be covered in the next number of posts.
1st Up - Build the Rod Beams
There are two lower level temporary spreaders that are about 10 1/2" on the floor. They give the boat structure will the dry storage boxes and the decks are installed. The rod beams set on top of these to establish the height off the floor. The rod beams are made from 4/4 stock milled to 13/16" x 2 1/2".
There are two rod beams that are 10' long, one each side of the boat, and the rift sawn white oak I have is 8'6". The first thing I have to do is to scarf two 6' long pieces together to make a 11' long piece. My board stretcher is busted.
I had to layout and cut scarf joints on each piece that are 8" long. I rough cut these on a jig I made for the table saw. and then made another jig to run a top bearing straight bit to fine tune the cut. (Difficult to explain without photos, sorry)
Once the cuts were made I sanded the scarfs with 80 grit to rough up the surface. I then mixed up some epoxy peanut butter and spread it on both scarf joints with an 1/8" notched trowel. I matched up the scarfs and clamped the joint together, careful not to starve the joint and squeeze out too much of the epoxy peanut butter.
The next day I took the clamps off and sanded the rod beams. I now have two 10'4" long pieces. I cut these to 10'1" long.
The next step is to cut 2 pieces of 1/4" Okoume plywood that are 2 1/2" wide by 8' long. These will be attached to the bottom of the rod beam forming a sort of "L". with the 1/4" piece oriented towards the interior of the boat. This 1/4" piece will become the rod holder. There will be rod storage on both sides.
This photo shows the 1/4' material that has been screwed to the bottom of the rod beam set on top of the lower temporary spreader. The 1/4" x 8' long piece is centered on the 10'long rod beam. There will eventually be a trim piece attached to the 1/4" shelf.
The 1/4" is screwed into the rod beam with 1" long stainless steel screws. These screws will be left in. and sealed with epoxy.
The rod beams with the 1/4" material attached are them placed in the boat on top of the spreaders and placed so they are touching the sides and the distance between the two rod beams measured across the boat are equal. This takes some fiddling around but once you get them parallel make a mark on top of the spreaders as a reference.
Now the rod beams must be scribed into the sides and then cut to length. The total length needs to be roughly 10' long. If they asre a little shorter once they are massaged to fit it's ok. Scribe the rod beams and then clamp the beams to a workbench and make the cuts with a Japanese pull saw. Once they are cut fine tune the cut by sanding the ends. take your time and get them to fit right.
Here's one of the ends of a rod beam scribed to fit the sides.
Once the rod beams are cut, both rod beams should be the same length and the distance between them should be the same. The two rod beams should be parallel.
When you are satisfied that the fit is correct. Take a pencil and mark around the beam ends were they meet the sides (4 locations). Remove the rod beam and drill two pilot holes from the inside to the outside. Then put the rod beams back in place and screw them in place from the outside. The screws will be temporary.
So at this point the two rod beams should be parallel and straight.
Here is a photo of one of the rod beams in place, temporarily screwed in place from the outside and sitting on both of the spreaders. The two spreaders are parallel.
Next Up - Deck Framing
Labels:
Drift Boat Construction
Birthday Traditions on the Lower Sac
I've had a tradition that has gone by the wayside but was resurrected this year. My son Zack is 13 and since he was about 6 we have hooked up with my good friend and stellar fishing guide Mike Hibbard to fish the Lower Sacramento River for my birthday. I've tried for the past couple of years but Zack has been busy with soccer, basketball and life in general. I asked him about going a couple of weeks ago and he replied instantly, "Yeah, let's go!" Tradition is back!
This was and is the best birthday gift I could wish for. A father and son day fishing with a good friend and me fishing rather than rowing. The stage is set pretty well don't you think.
We arrived in Redding at about 10:30 because Mike said there was no hurry to get there as the bite hasn't really started happening until mid morning. We were doing the Possey Ground to Bonnieview float and Mike's comment was that there are a lot of big fish in the upper portion of the river and if you take off too early the resident rainbows just aren't ready for breakfast. We planned on fishing late.
We placed Zack in the front of the boat and in didn't take long until he hooked up with a nice fish. We were deep indicator nymphing and the fish took a micro caddis nymph. Now for those that have not experienced it, hooking a hot Lower Sac fish is one thing, landing it is another. Mike commented that if you land half the fish you hook up, you're doing good. We were rigged with 9 foot tapered leaders, shot and 3 flies. That puts a hooked fish anywhere from 8 1/2 feet to 10 1/2 feet down from your indicator depending on which fly it ate. Once you've worked the fish close enough and have it ready to land you've got to reach above your head to get the fish up to the net. This is pretty awkward! With coaching from Mike, Zack worked the first fish to the boat after a number of runs. Lifted as instructed and we had the first fish to the boat. Take a look at this beaut.
The fish were cooperative with my birthday wishes and we were able coax many fish to the net on this beautiful fall day. Zack had the best day he's every had on the Lower Sac, not necessarily quantity but definitely quality. Every fish we caught had been eating pretty good. Thick and fat.
We had a great day, caught fish, lost fish and enjoyed a renewed connection with Mike. I couldn't have had a better birthday.
Labels:
Fishing Trips
Subscribe to:
Posts (Atom)